Platinum 3776 Deconstruction
This is a little bit of a departure from the other articles that I’ve done so far but I thought that I would show a complete teardown of a Platinum 3776 and talk about some of the techniques that were used to make it. I will also talk about some of the design choices and attempt to explain them with a manufacturing lens. This is part of a series on how to modify a 3776 with a filling system, new feed, and a few other things. I thought that the best way to start out would be to talk about how to take apart a 3776.
The Cap:
The cap of the 3776 is easily the most complicated portion of the pen. It contains 9 separate pieces and possibly more depending on how you count them (more on that later). This encompasses the Slip and Seal mechanism, the clip, and the finial. Let’s start with the Slip and Seal mechanism.
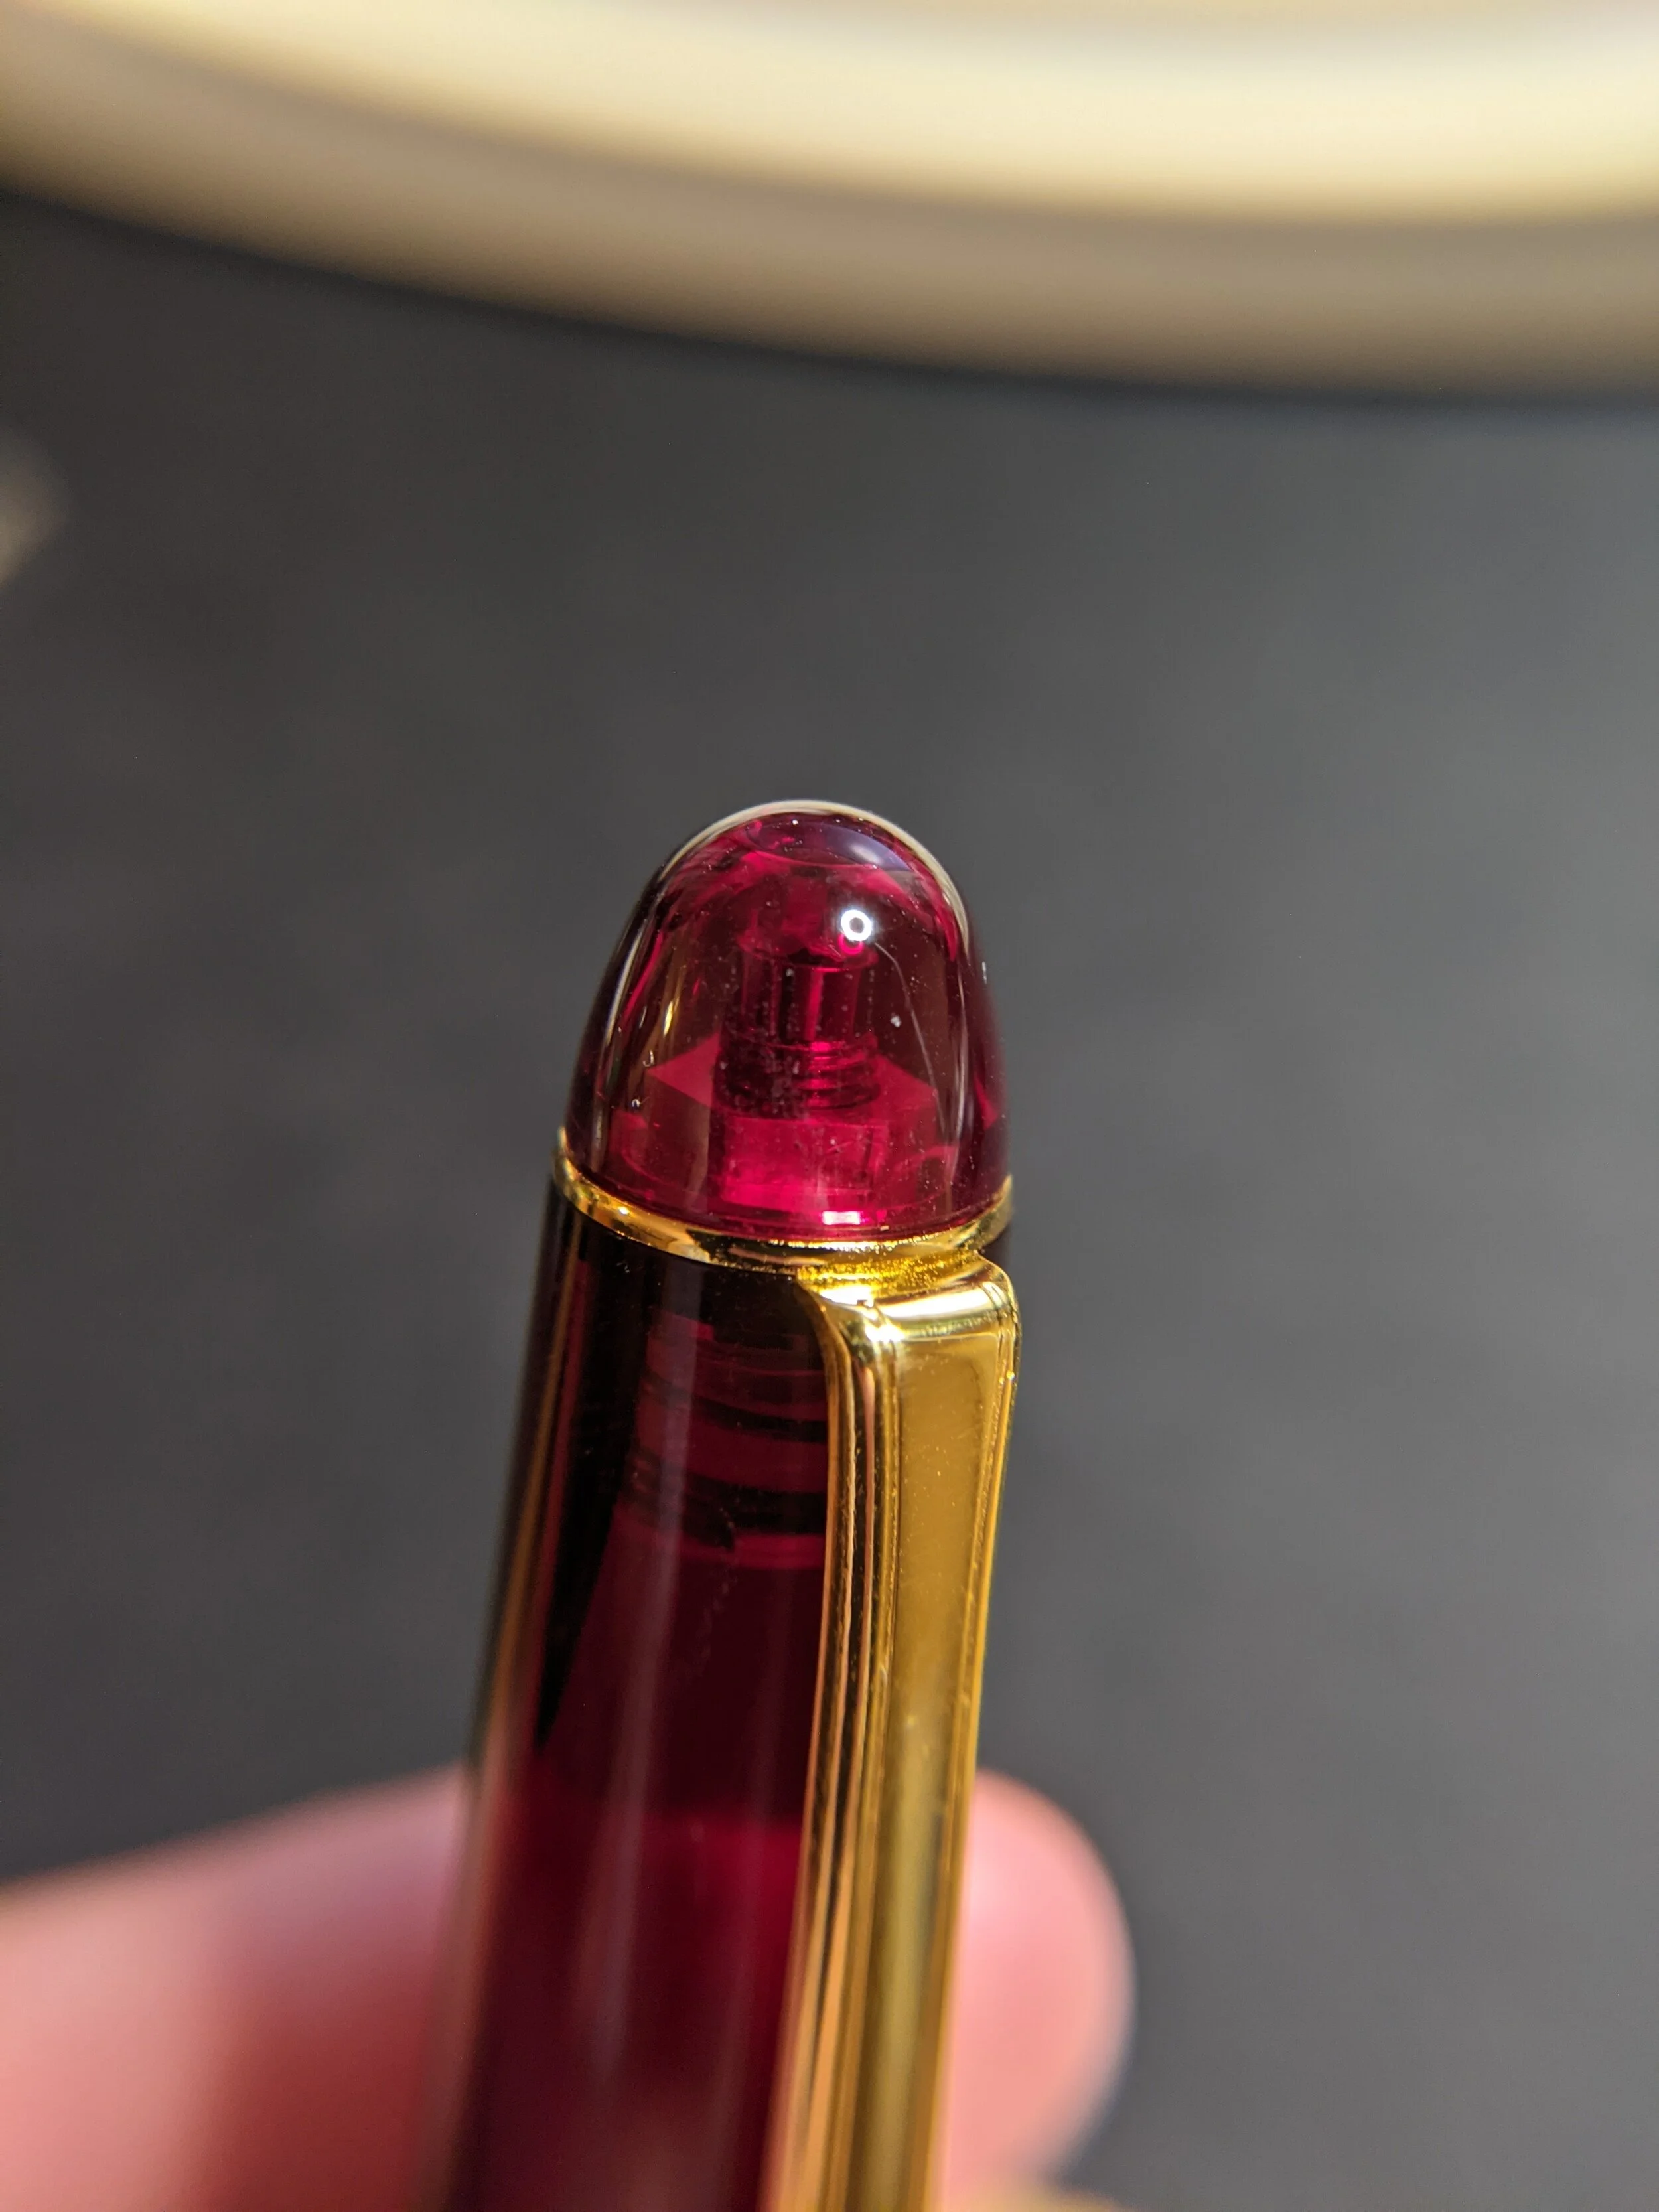
Full Finial Assembly
The Slip and Seal mechanism is a modification to a traditional inner cap. Most pens will have an inner cap inside the outer plastic cap to keep the nib from drying out. The idea is that the inner cap is made of soft plastic so when the grip section mates up to the inner there is a good seal. What makes Platinum’s Slip and Seal different is the inner cap is held on a spring inside the outer cap so when the grip section mates with the inner cap it depresses the spring.
I could see this having some advantages though these are just theories for why they’ve done this. For one, it leaves a little bit of room for error when it comes to the threads. The manufacture of threads is somewhat complicated and hard to get exactly the same every single time. There is bound to be a little bit of wobble and the seal will likely not mate up exactly to the inner cap. The small gaps that result can be rectified by the spring. The spring can wobble slightly to get a better interface between the grip section and the inner cap.
The other advantage would be that the spring can apply force to the grip section and create a better seal that way. I don’t find this reason as compelling as there will be much more force generated by the threads against the cap than the spring will create. Perhaps when capping people don’t usually twist in all the way and allow for more gaps than if they were to really tighten down the pen.
The mechanism is 3 parts, an inner cap, a spring, and a metal piece with threads that connects them to the rest of the finial. They are pictured here both apart and put together:
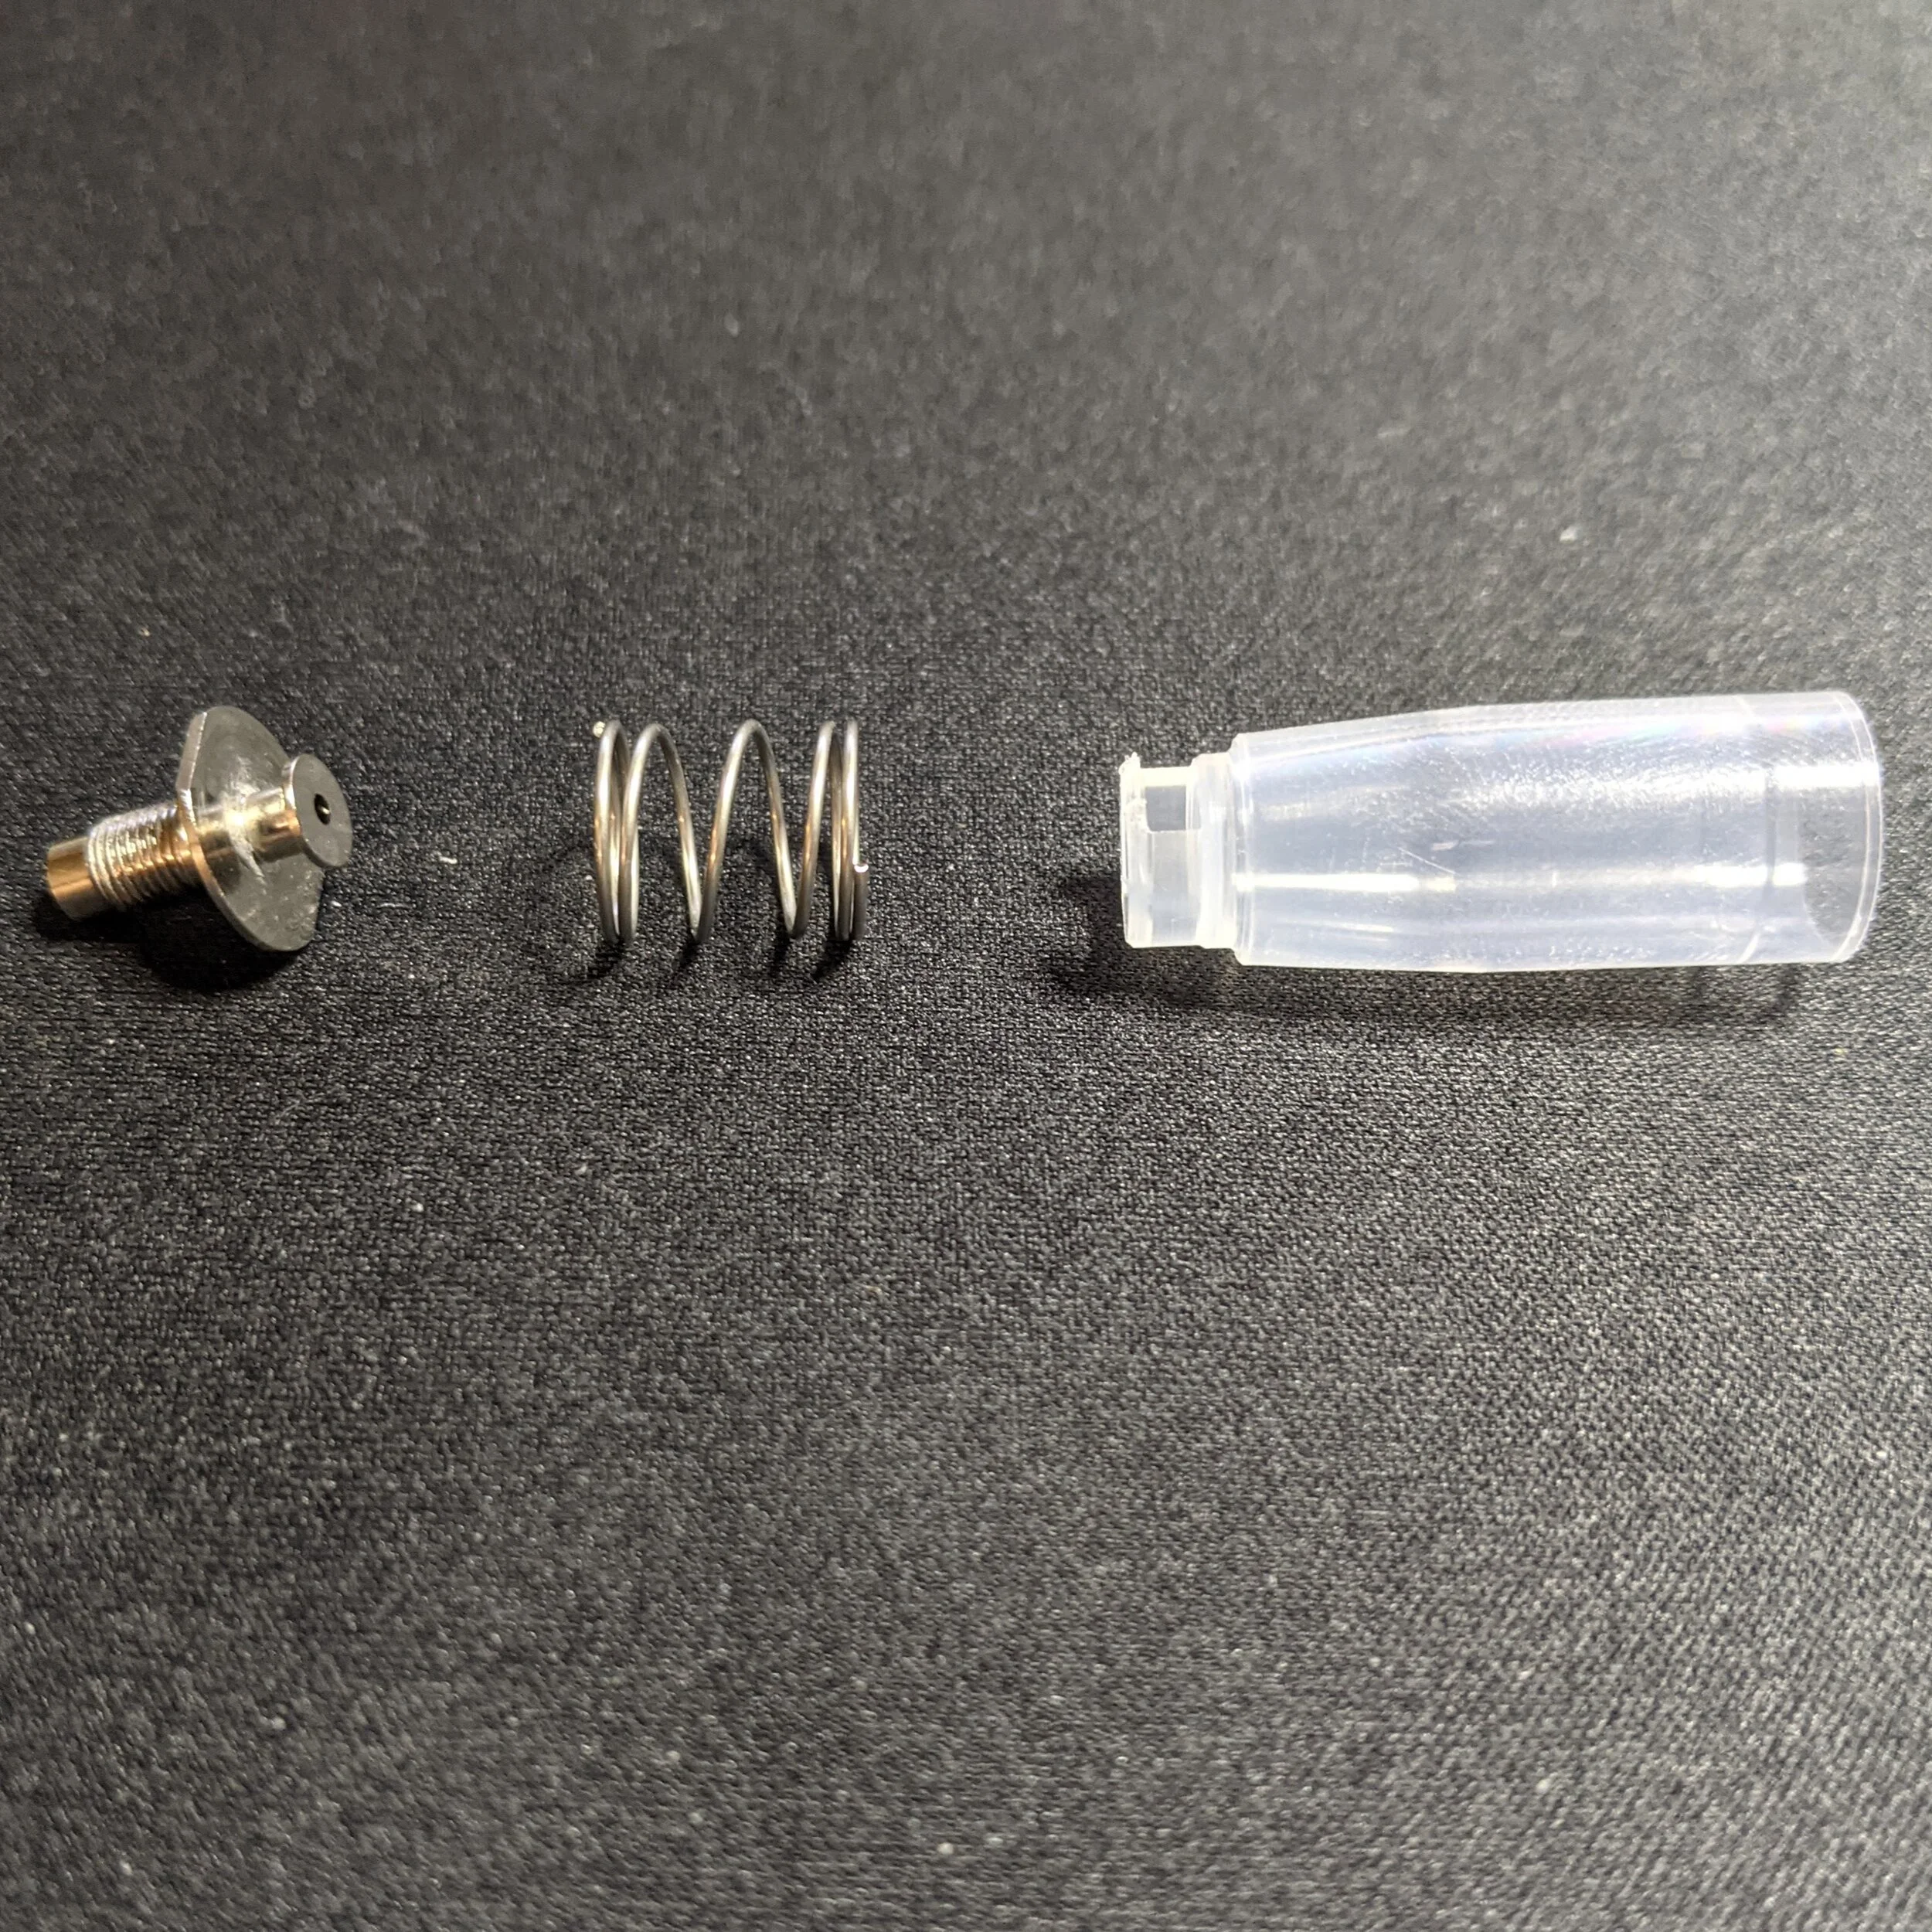
This is a disassembled version of the Slip and Seal
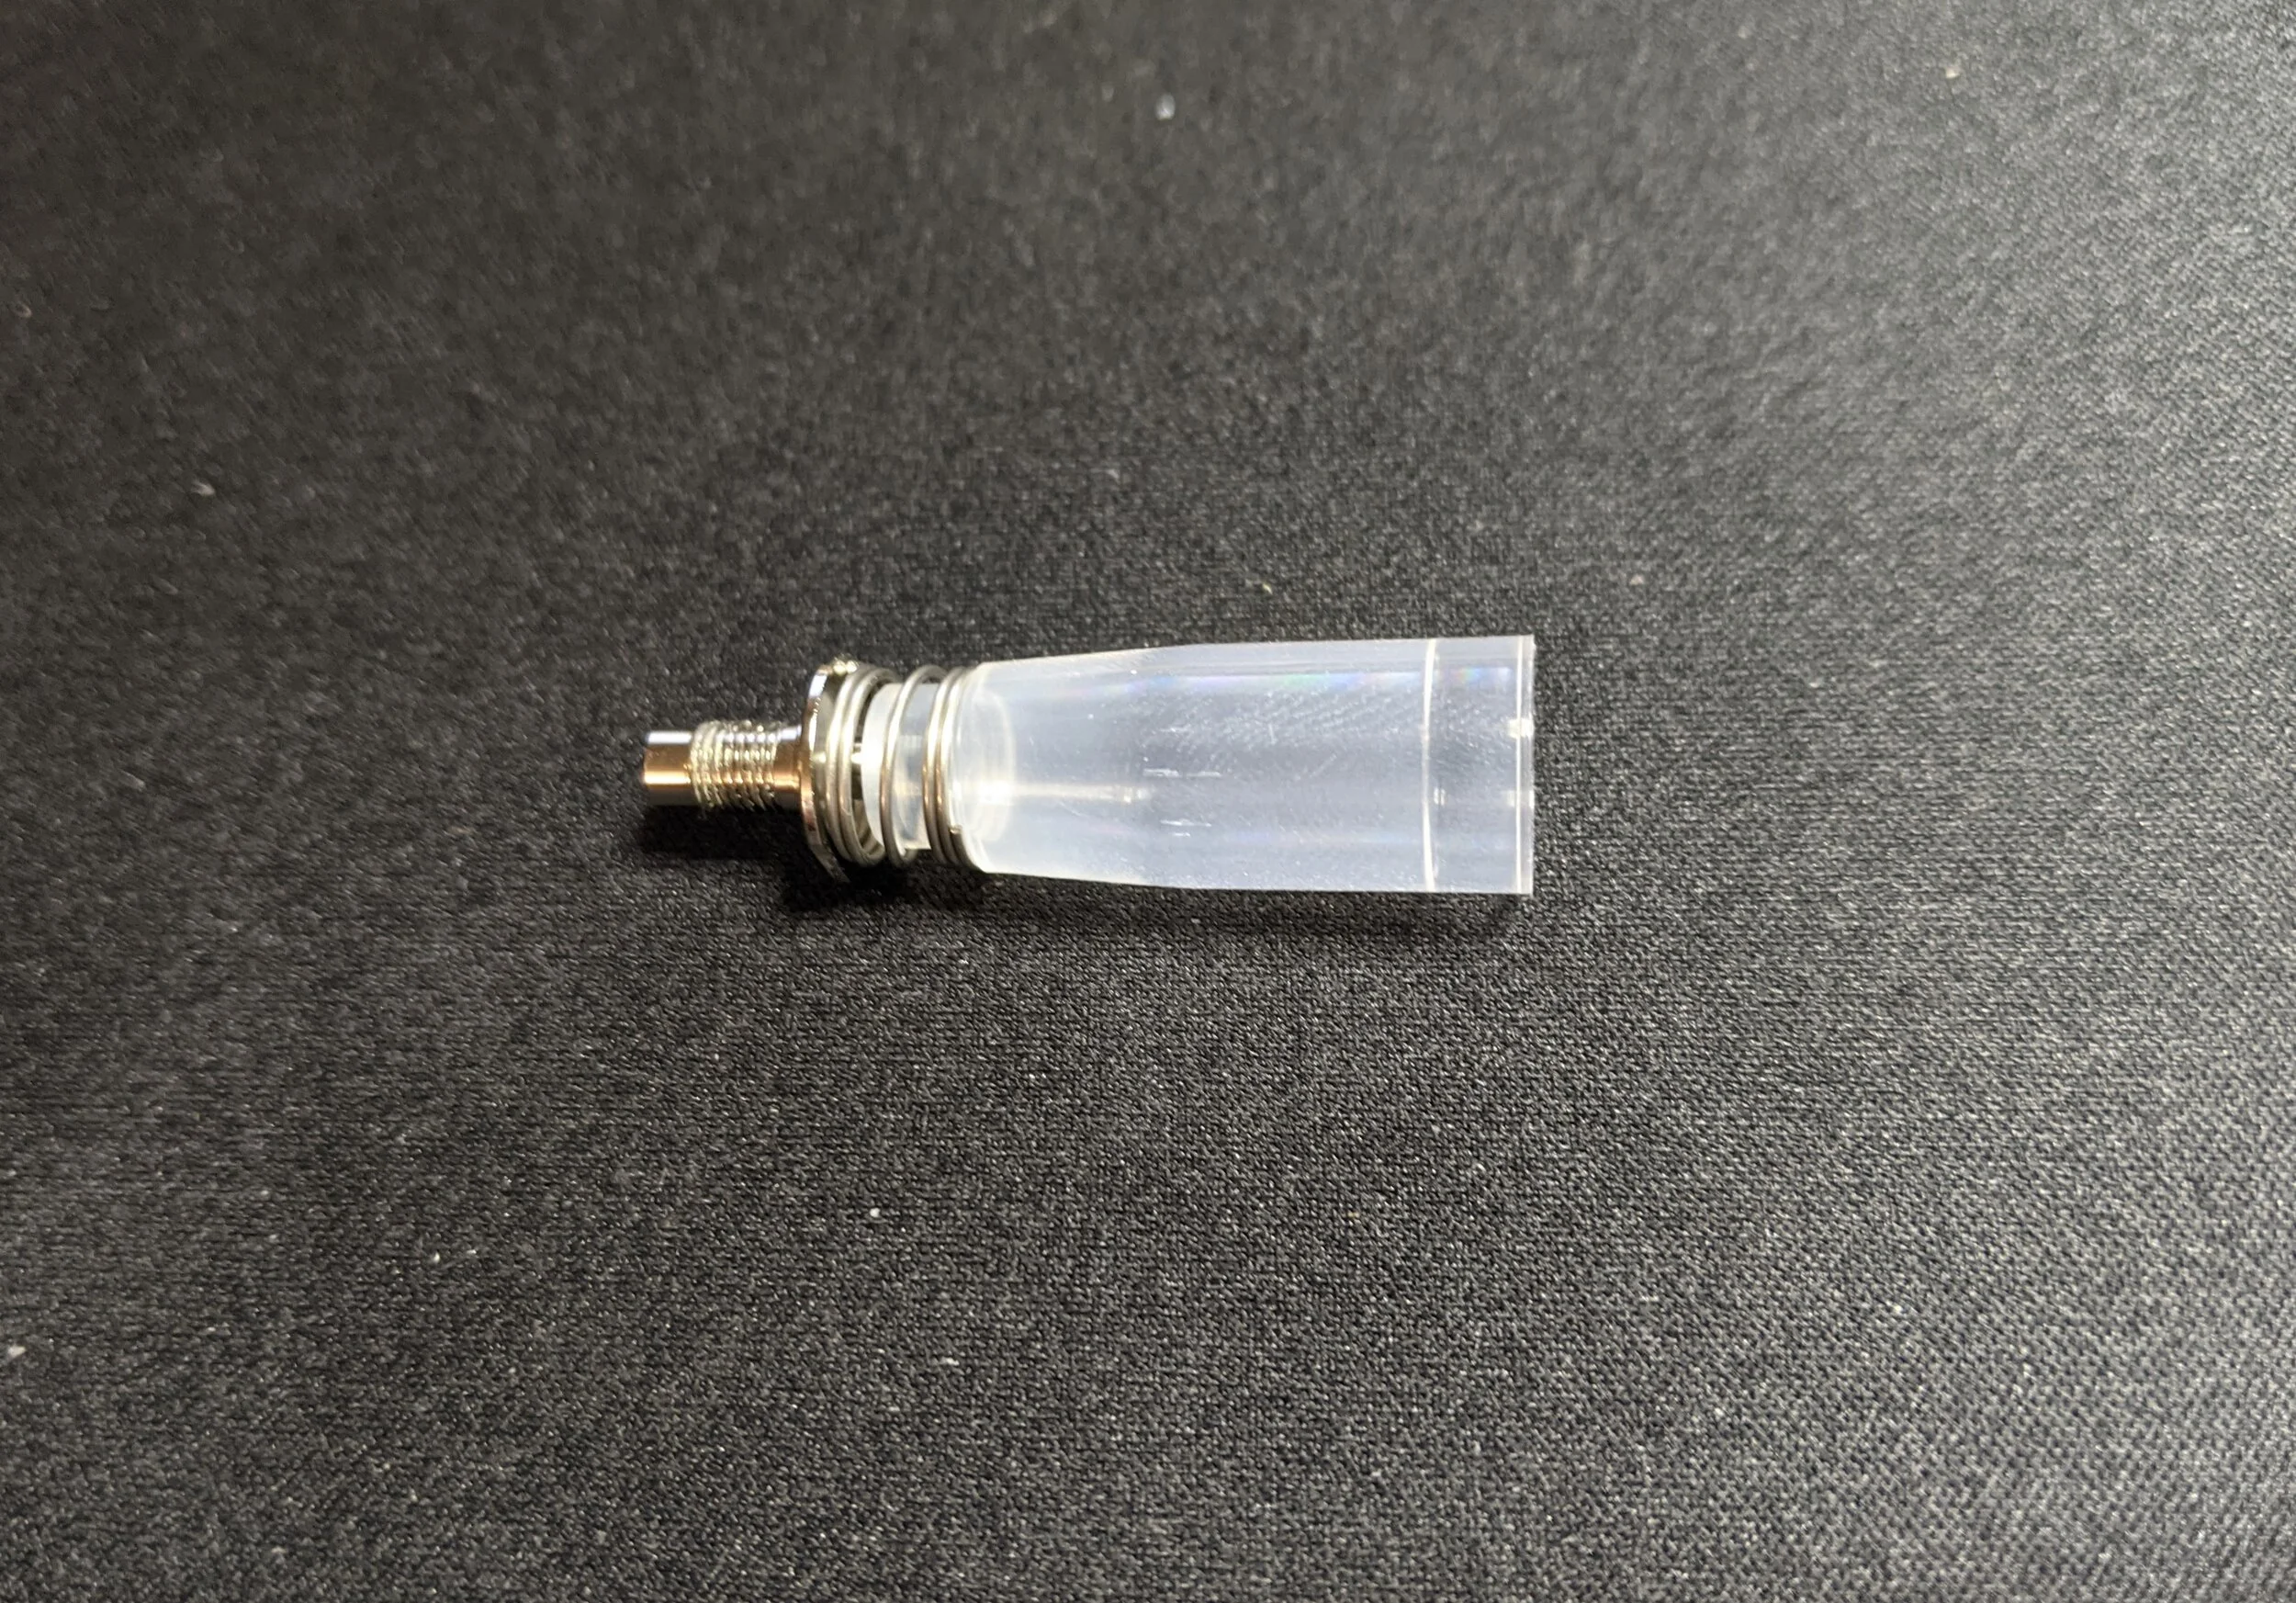
This is a fully assembled version of the Slip and Seal
That threaded side of the metal piece goes through the top of the cap and connects to a set of layered pieces that comprise the finial. They go in order from bottom to top as follows: steel washer, clip, gold plated washer/finial band, brass nut, then finial. The brass nut is what keeps the entire finial sandwich together. The actual plastic finial on the end has a small rod coming out of it that goes into the metal rod that holds the inner cap and that the brass nut is attached to. It seems as though they've used some kind of glue that is never meant to be removed.
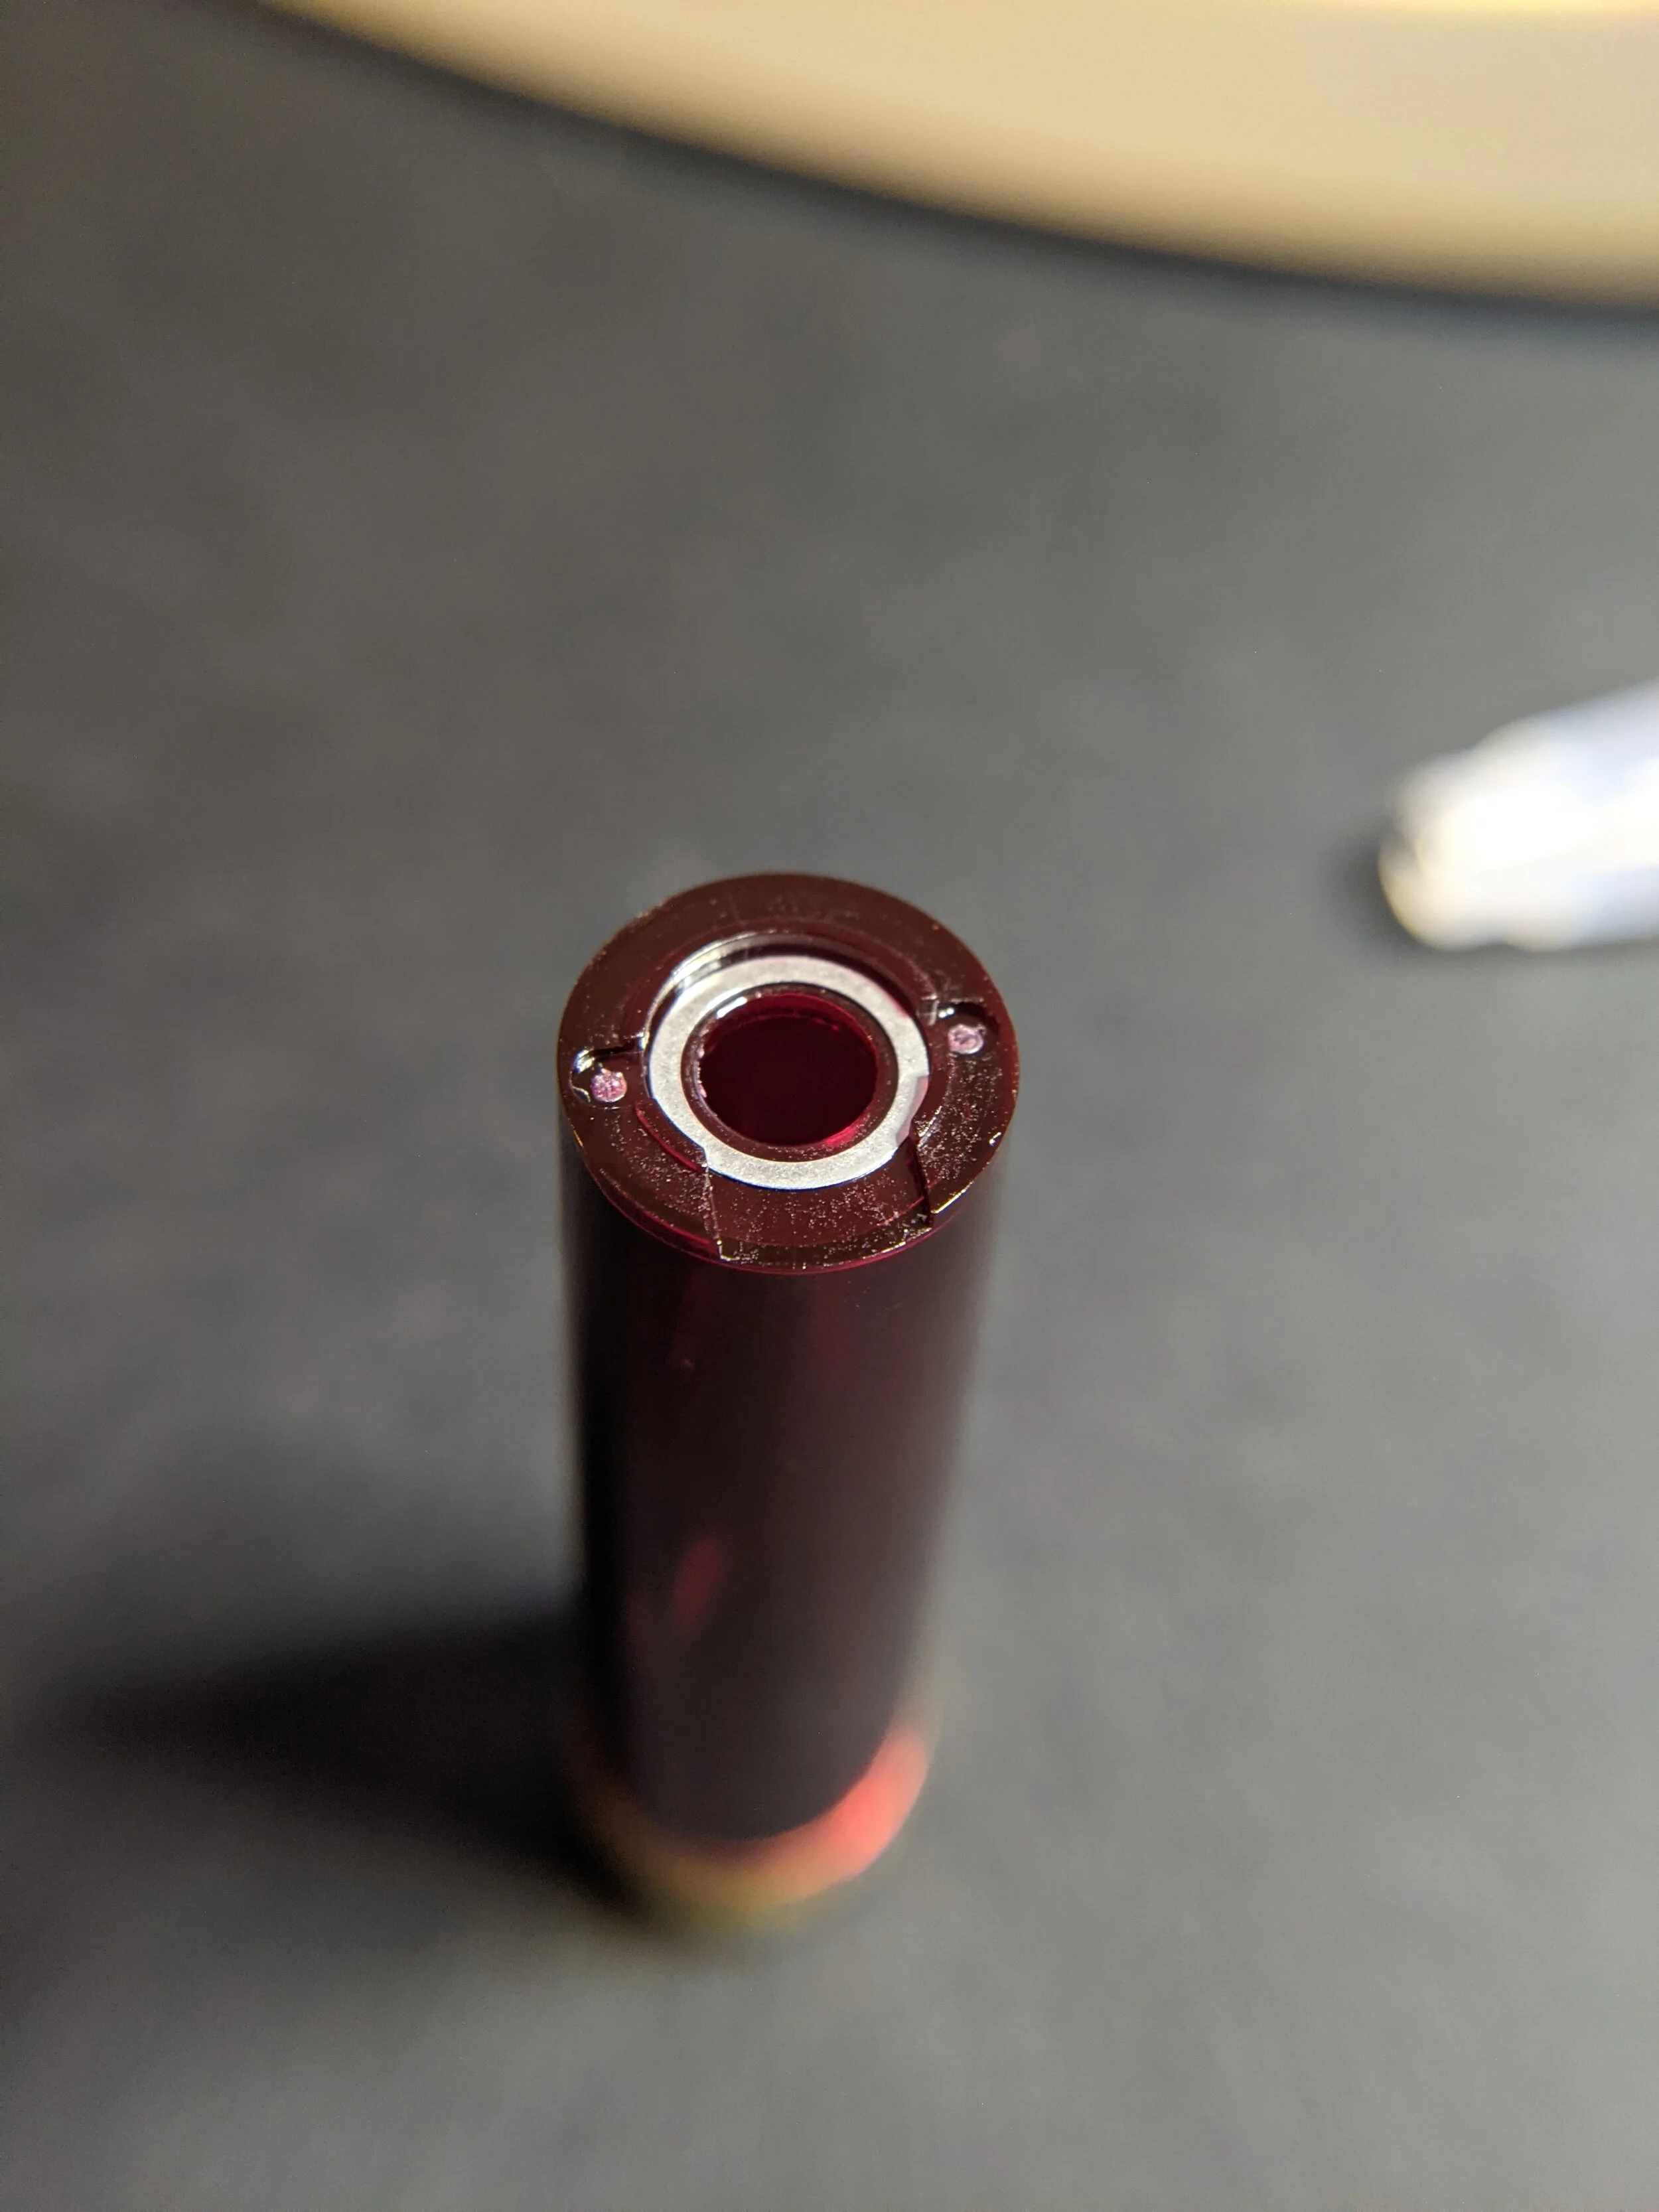
Steel Ring
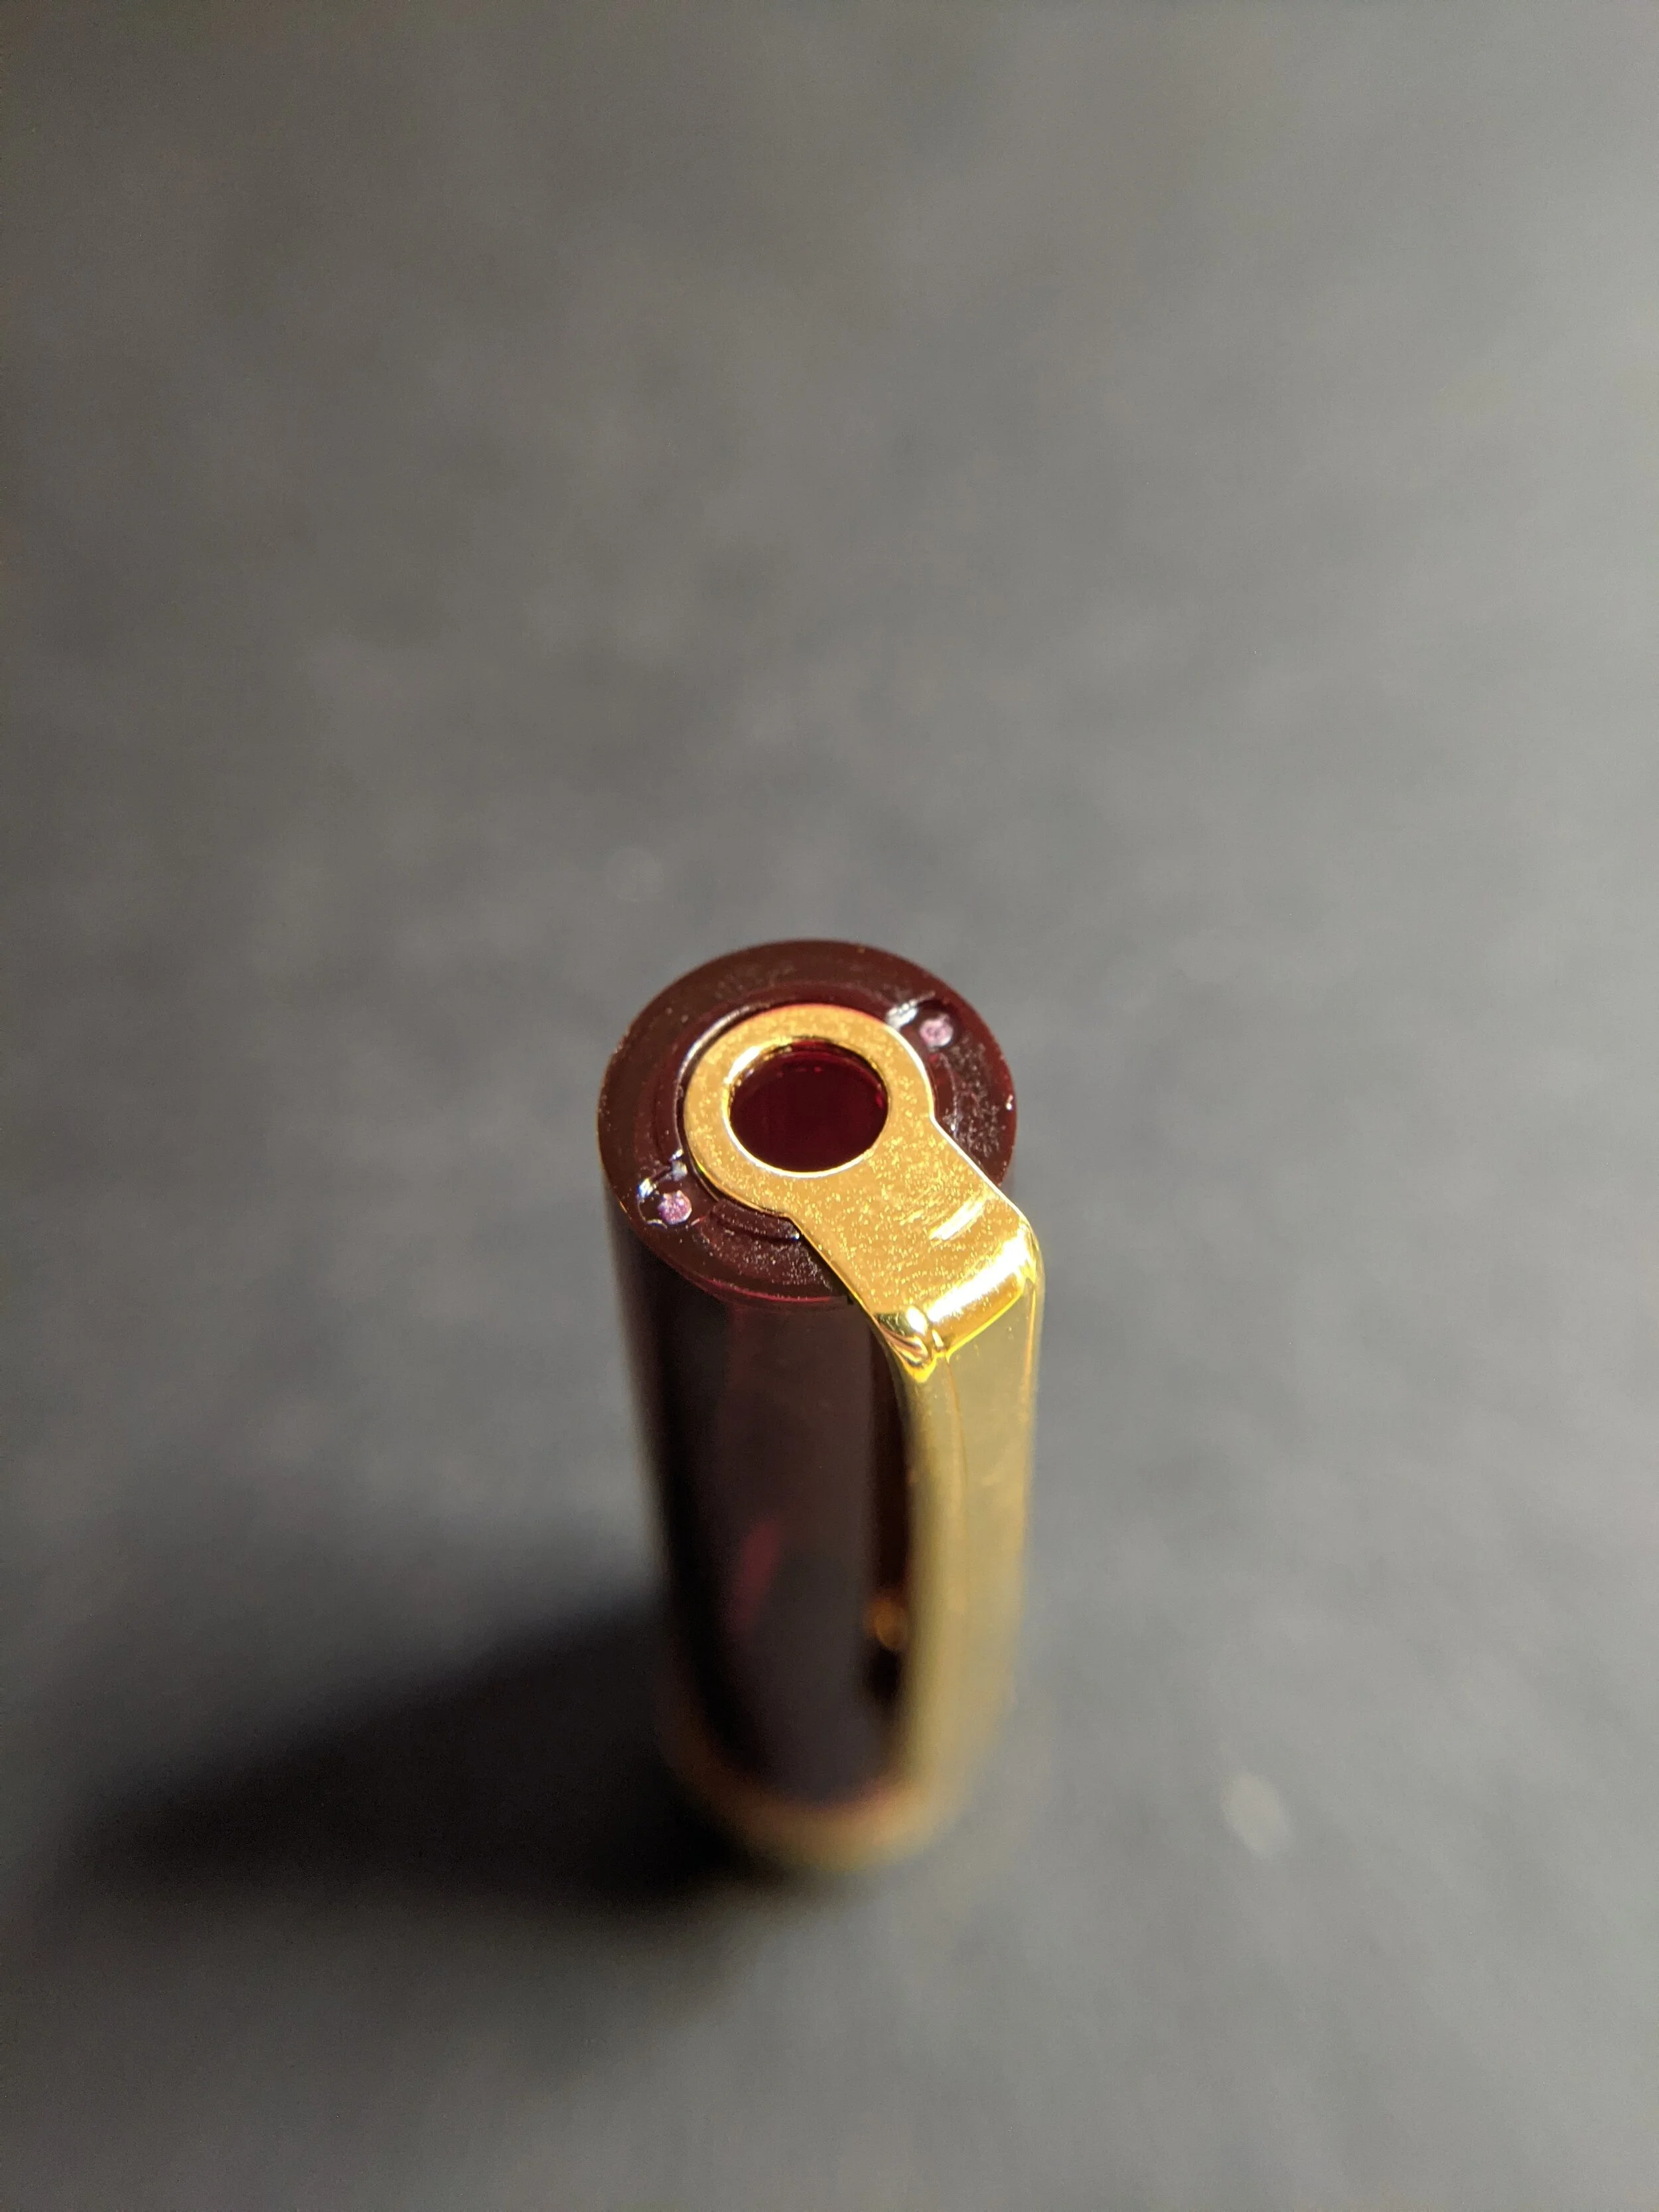
Clip
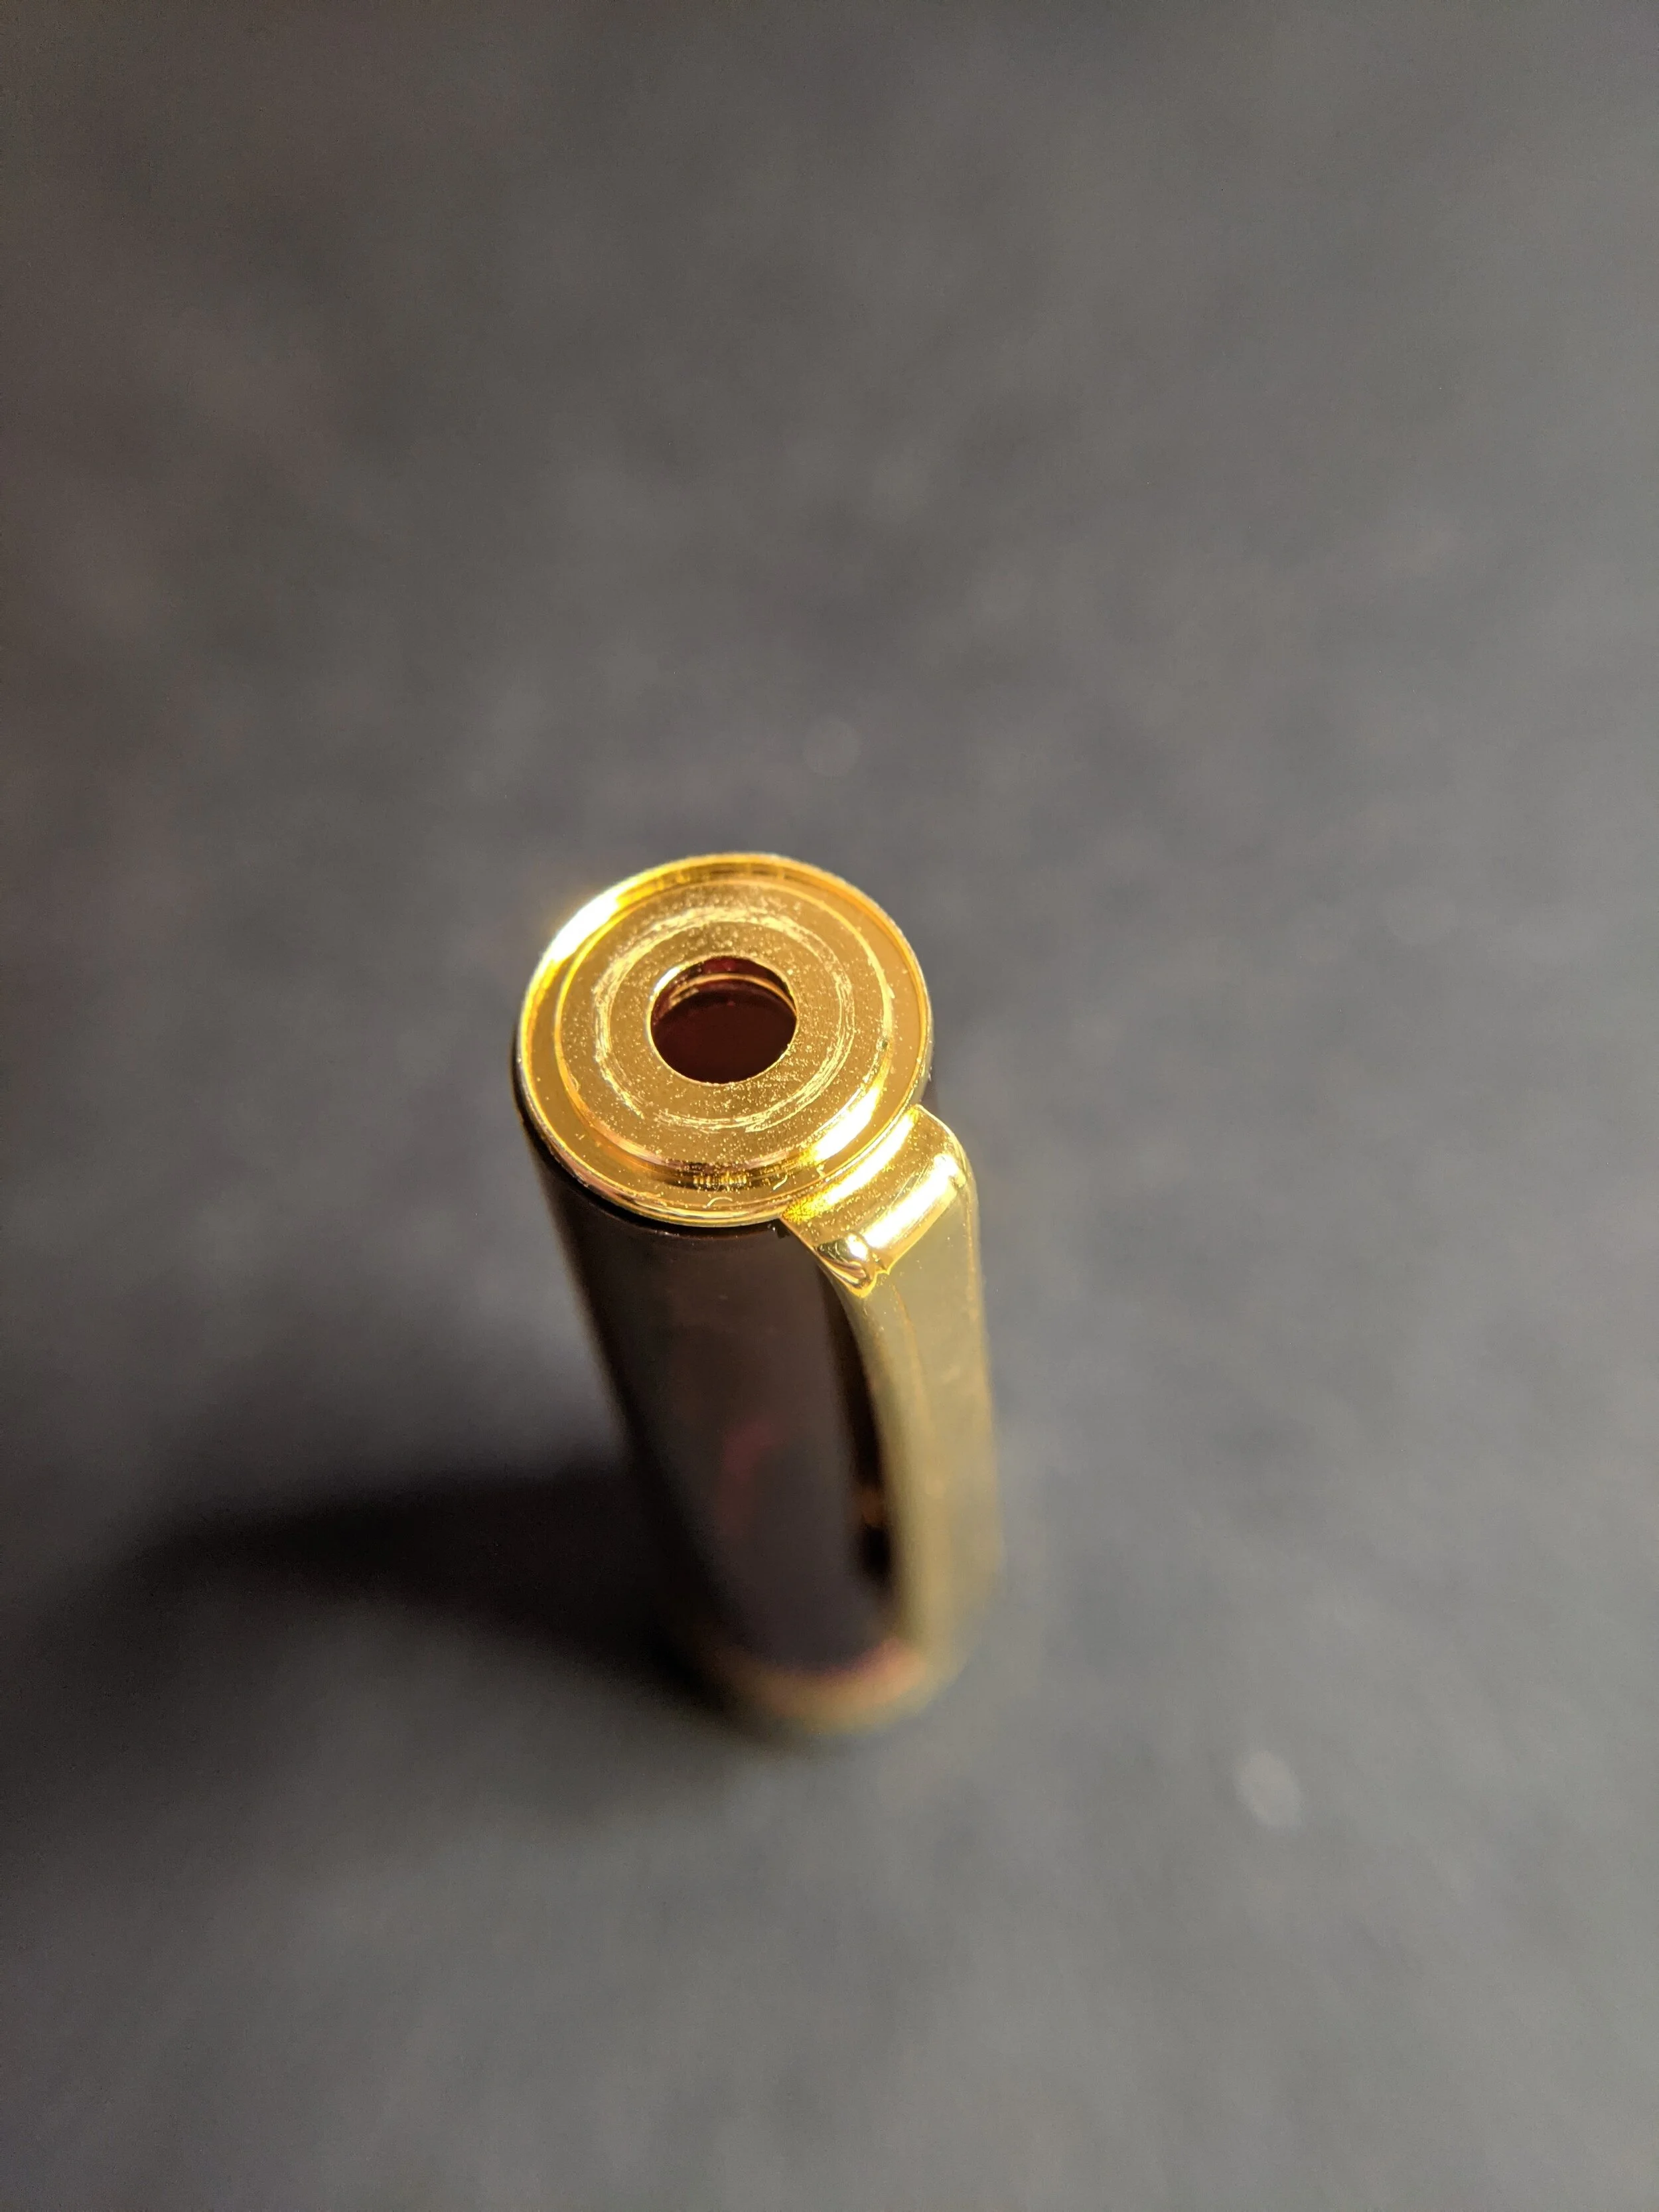
Brass ring
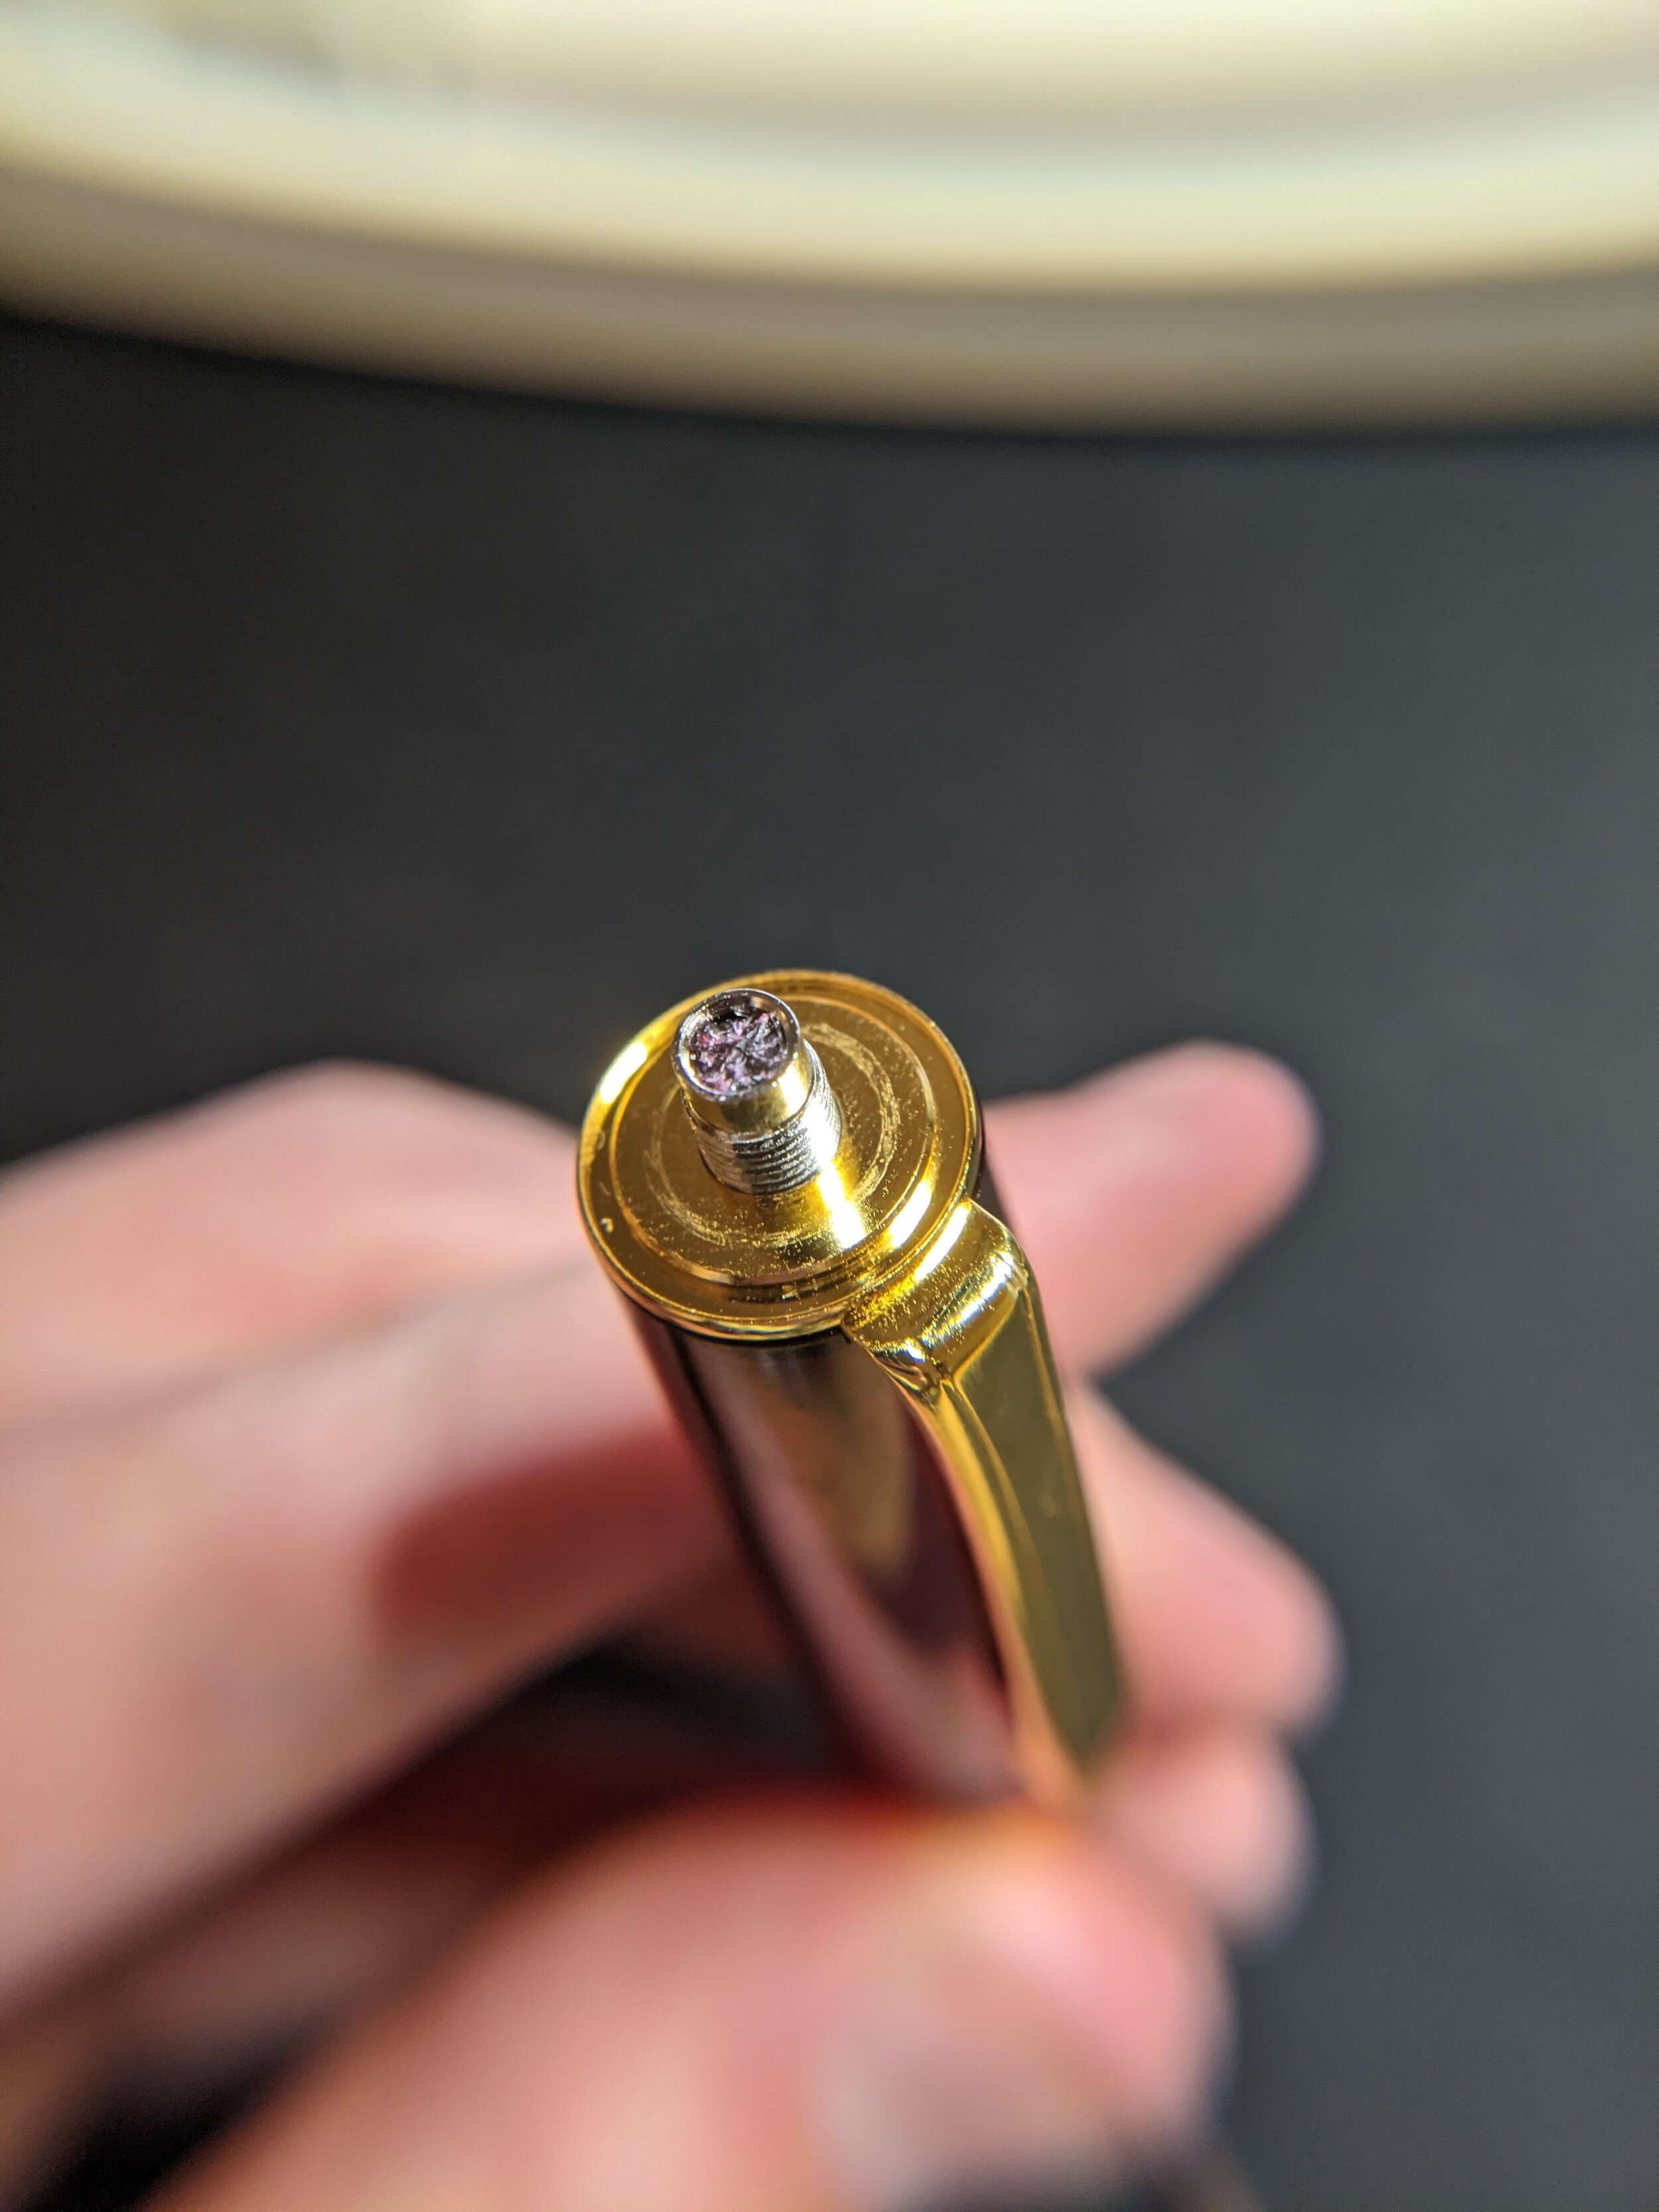
Threaded rod, you can see the acrylic rod that snapped off
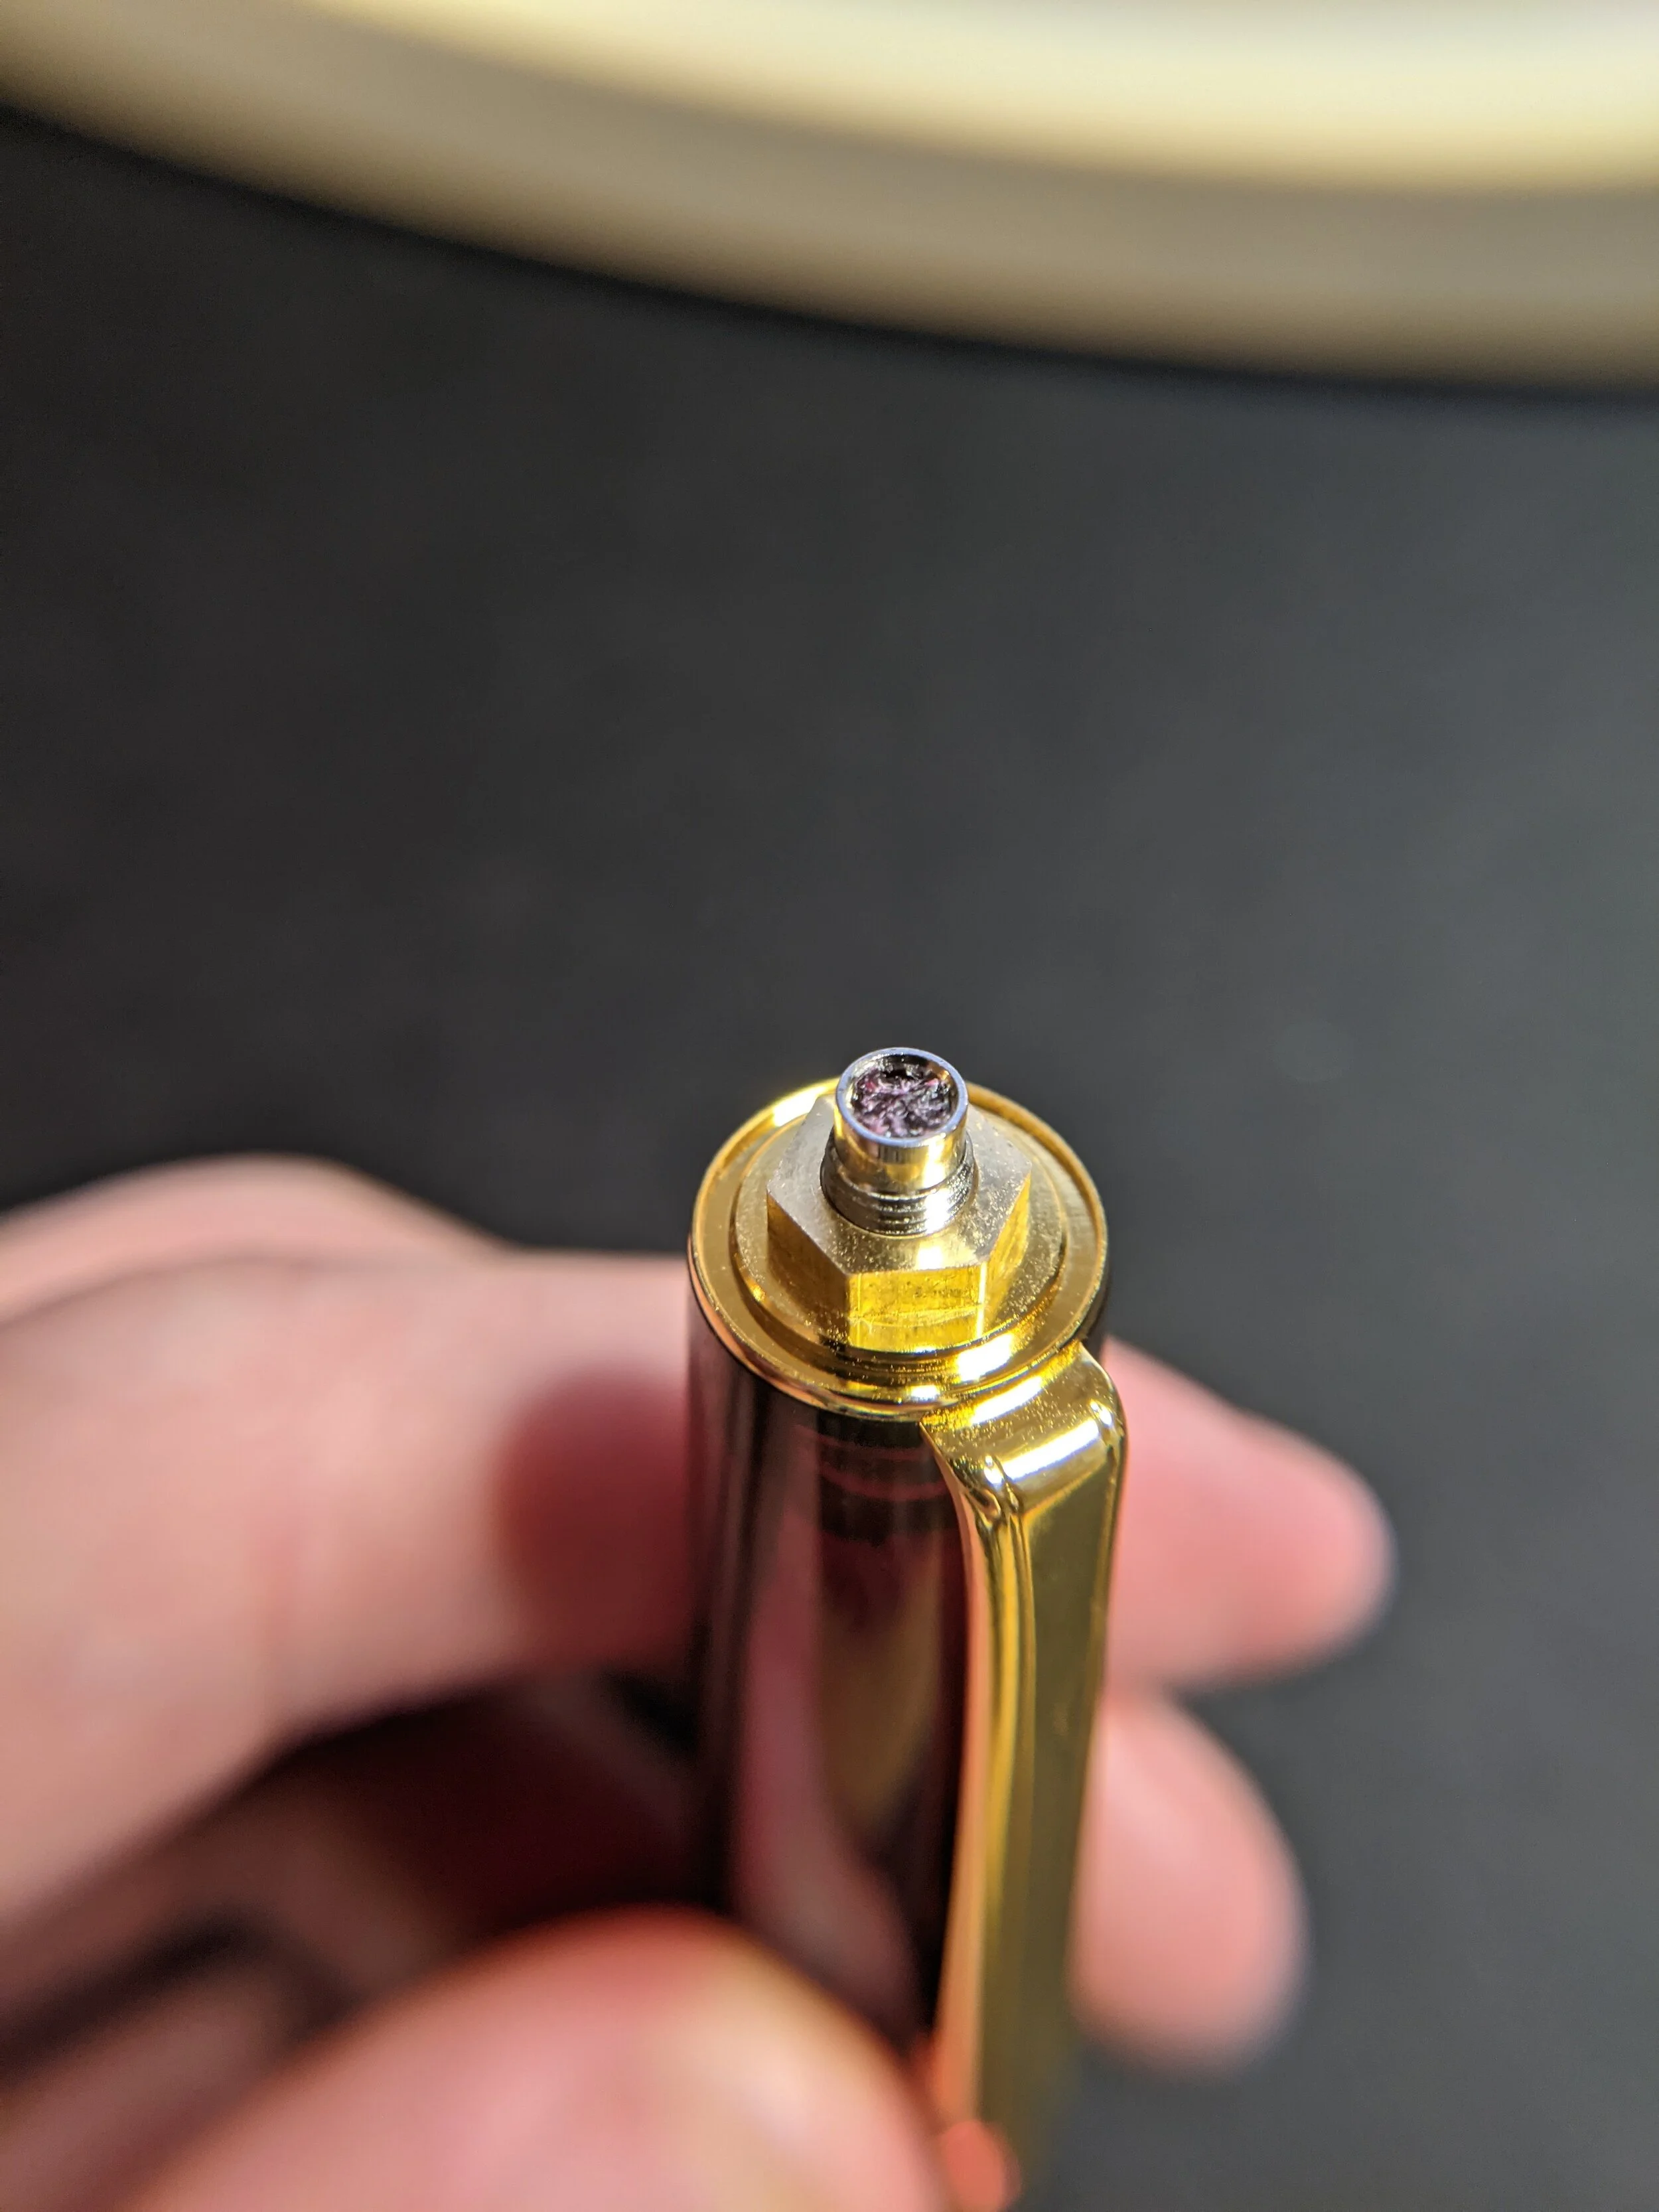
Brass nut
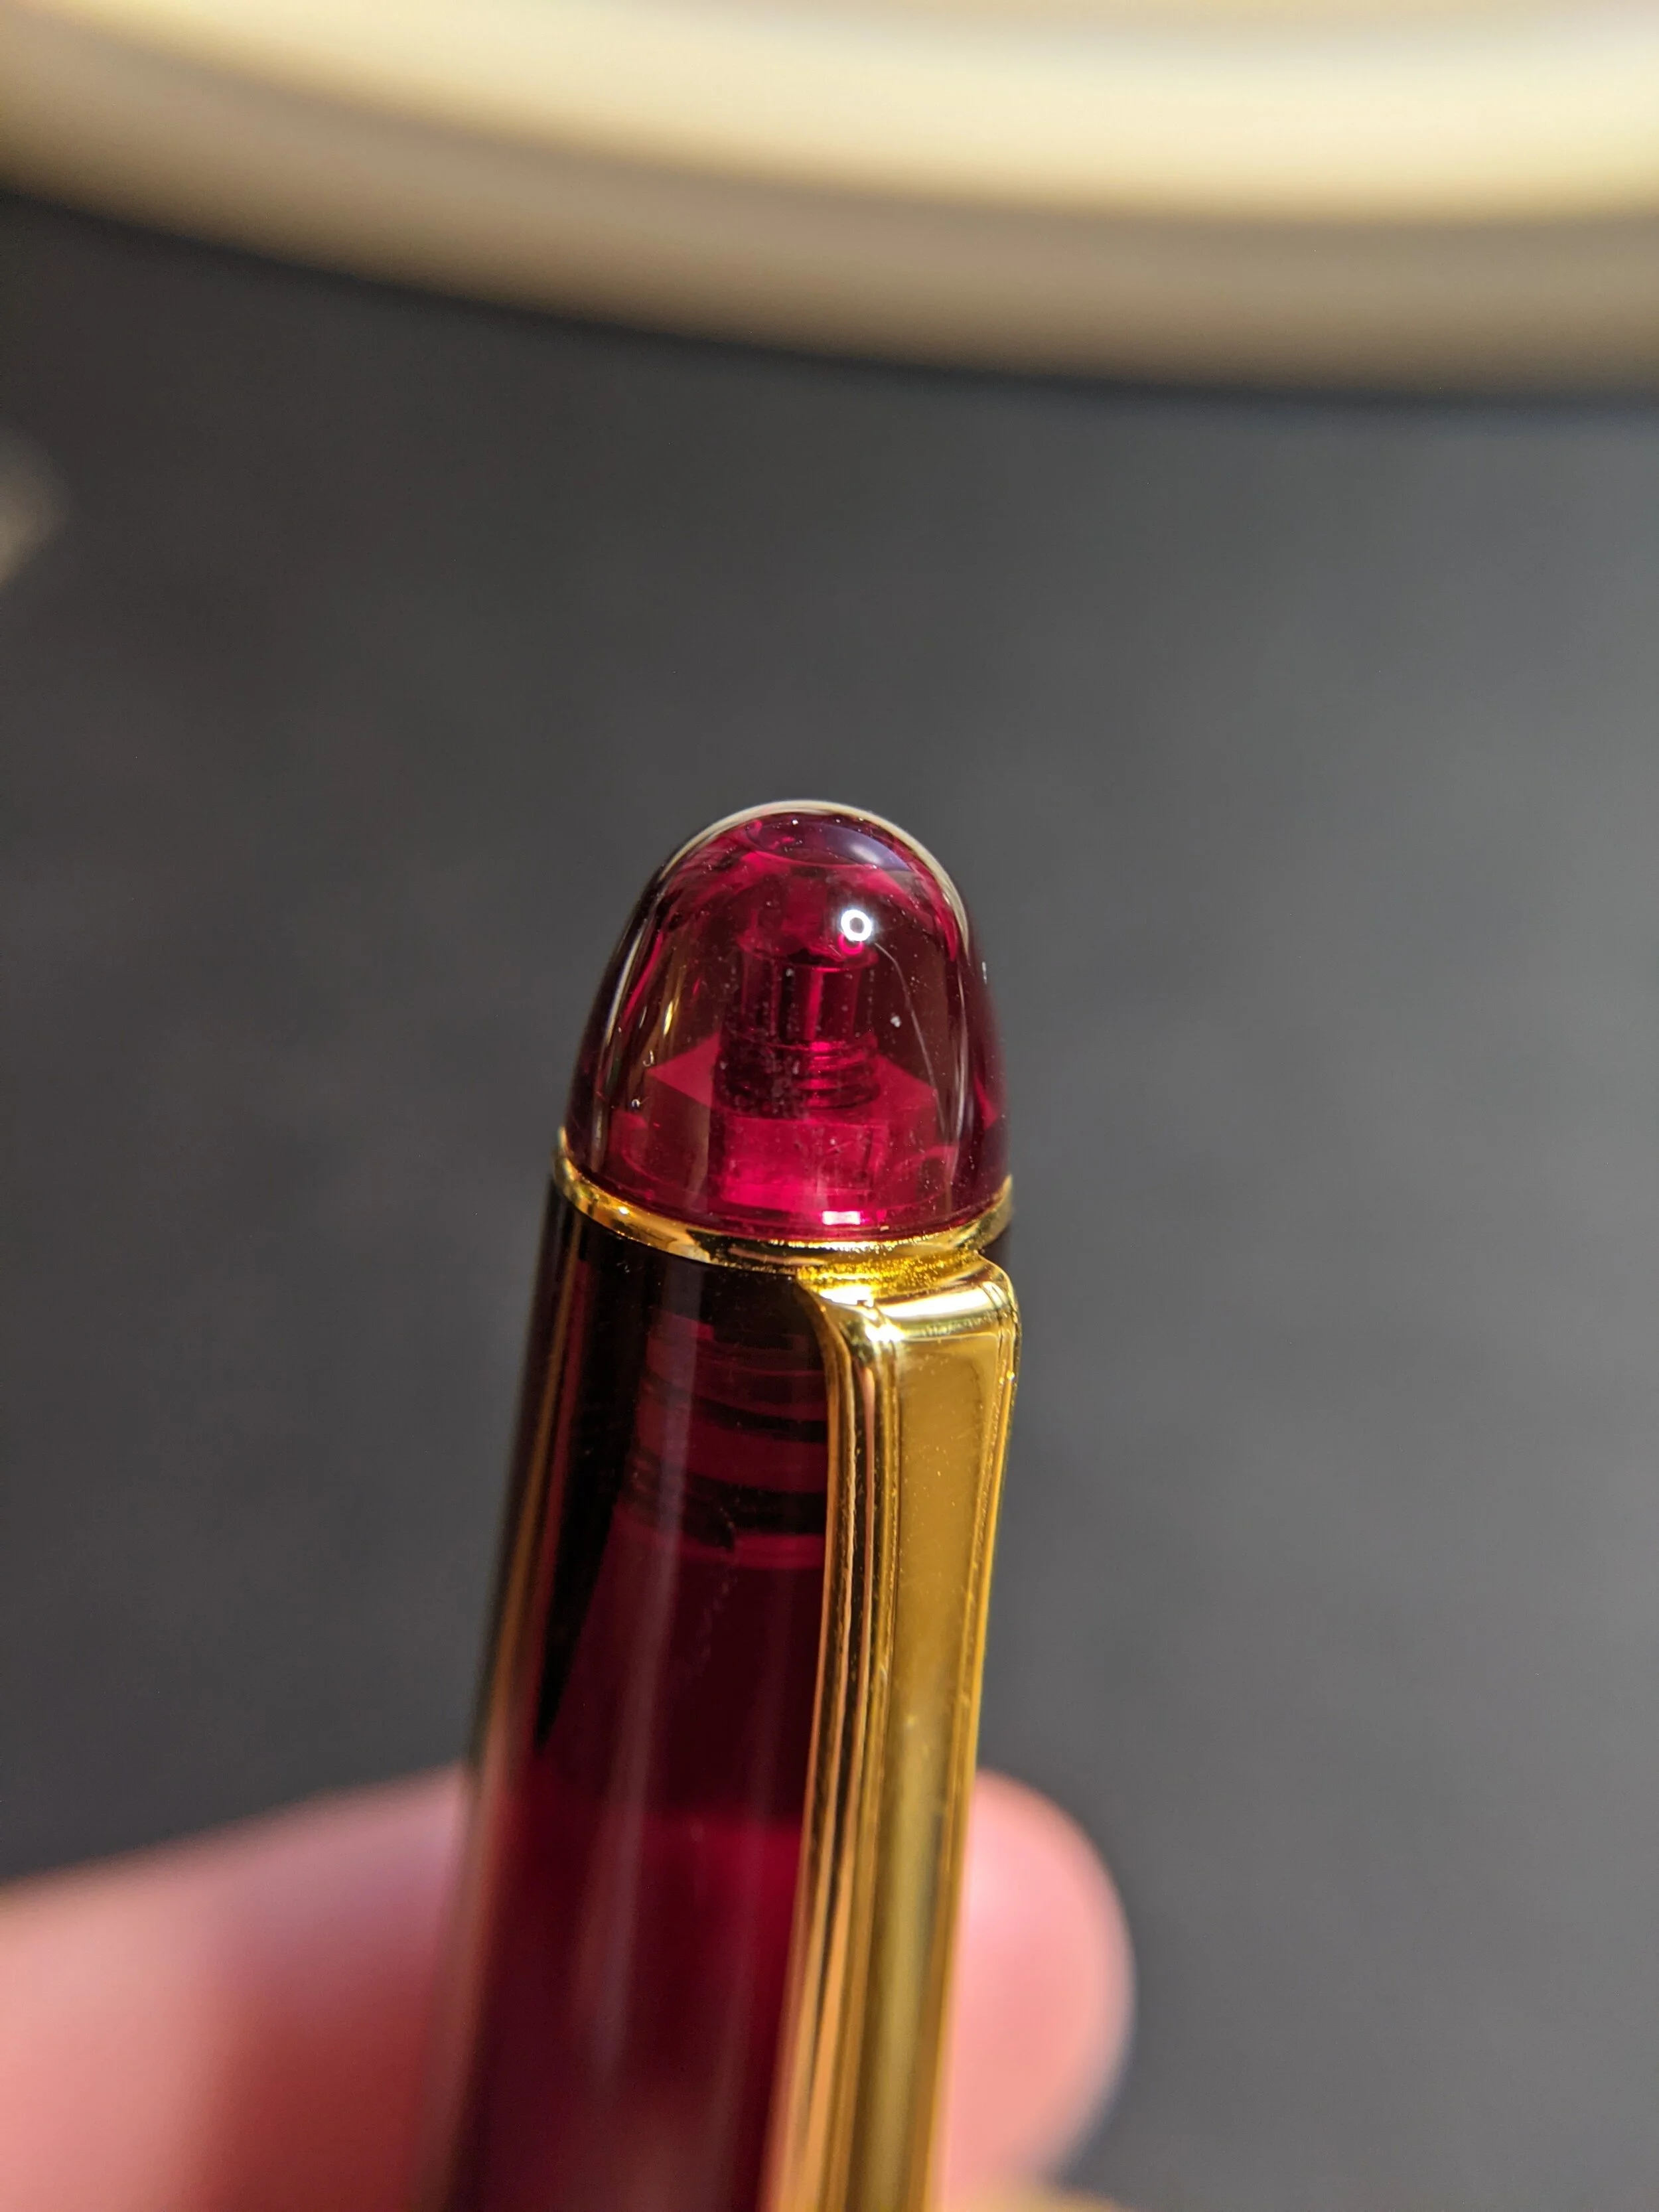
Fully assembled
Case and point I wasn’t able to remove this without completely shearing this little plastic rod in half. I took it apart using some boiled water which admittedly is not the gentlest way to apply heat. A better way would be to use a hair drier or something like that. The twisting was too much for the small rod. According to Inky Rocks it is possible to remove this by just heating the finial.
It should just pop off with the heat. The glue comes off because the heat causes everything to expand. Because the glue and other materials are very different they will expand at very different rates. This causes the glue which is very brittle to break.
The Grip/Section:
The grip is something that I took apart by accident and it was the more surprising part of this as I had never seen anyone take it apart before. I was looking at my Platinum Nice which has a clear grip section and I thought that some ink had gotten into it. I tried to flush it out repeatedly and eventually, I decided that I wanted to just take the pen apart. I used boiling water to loosen the glue and I was able to twist apart the grip section.
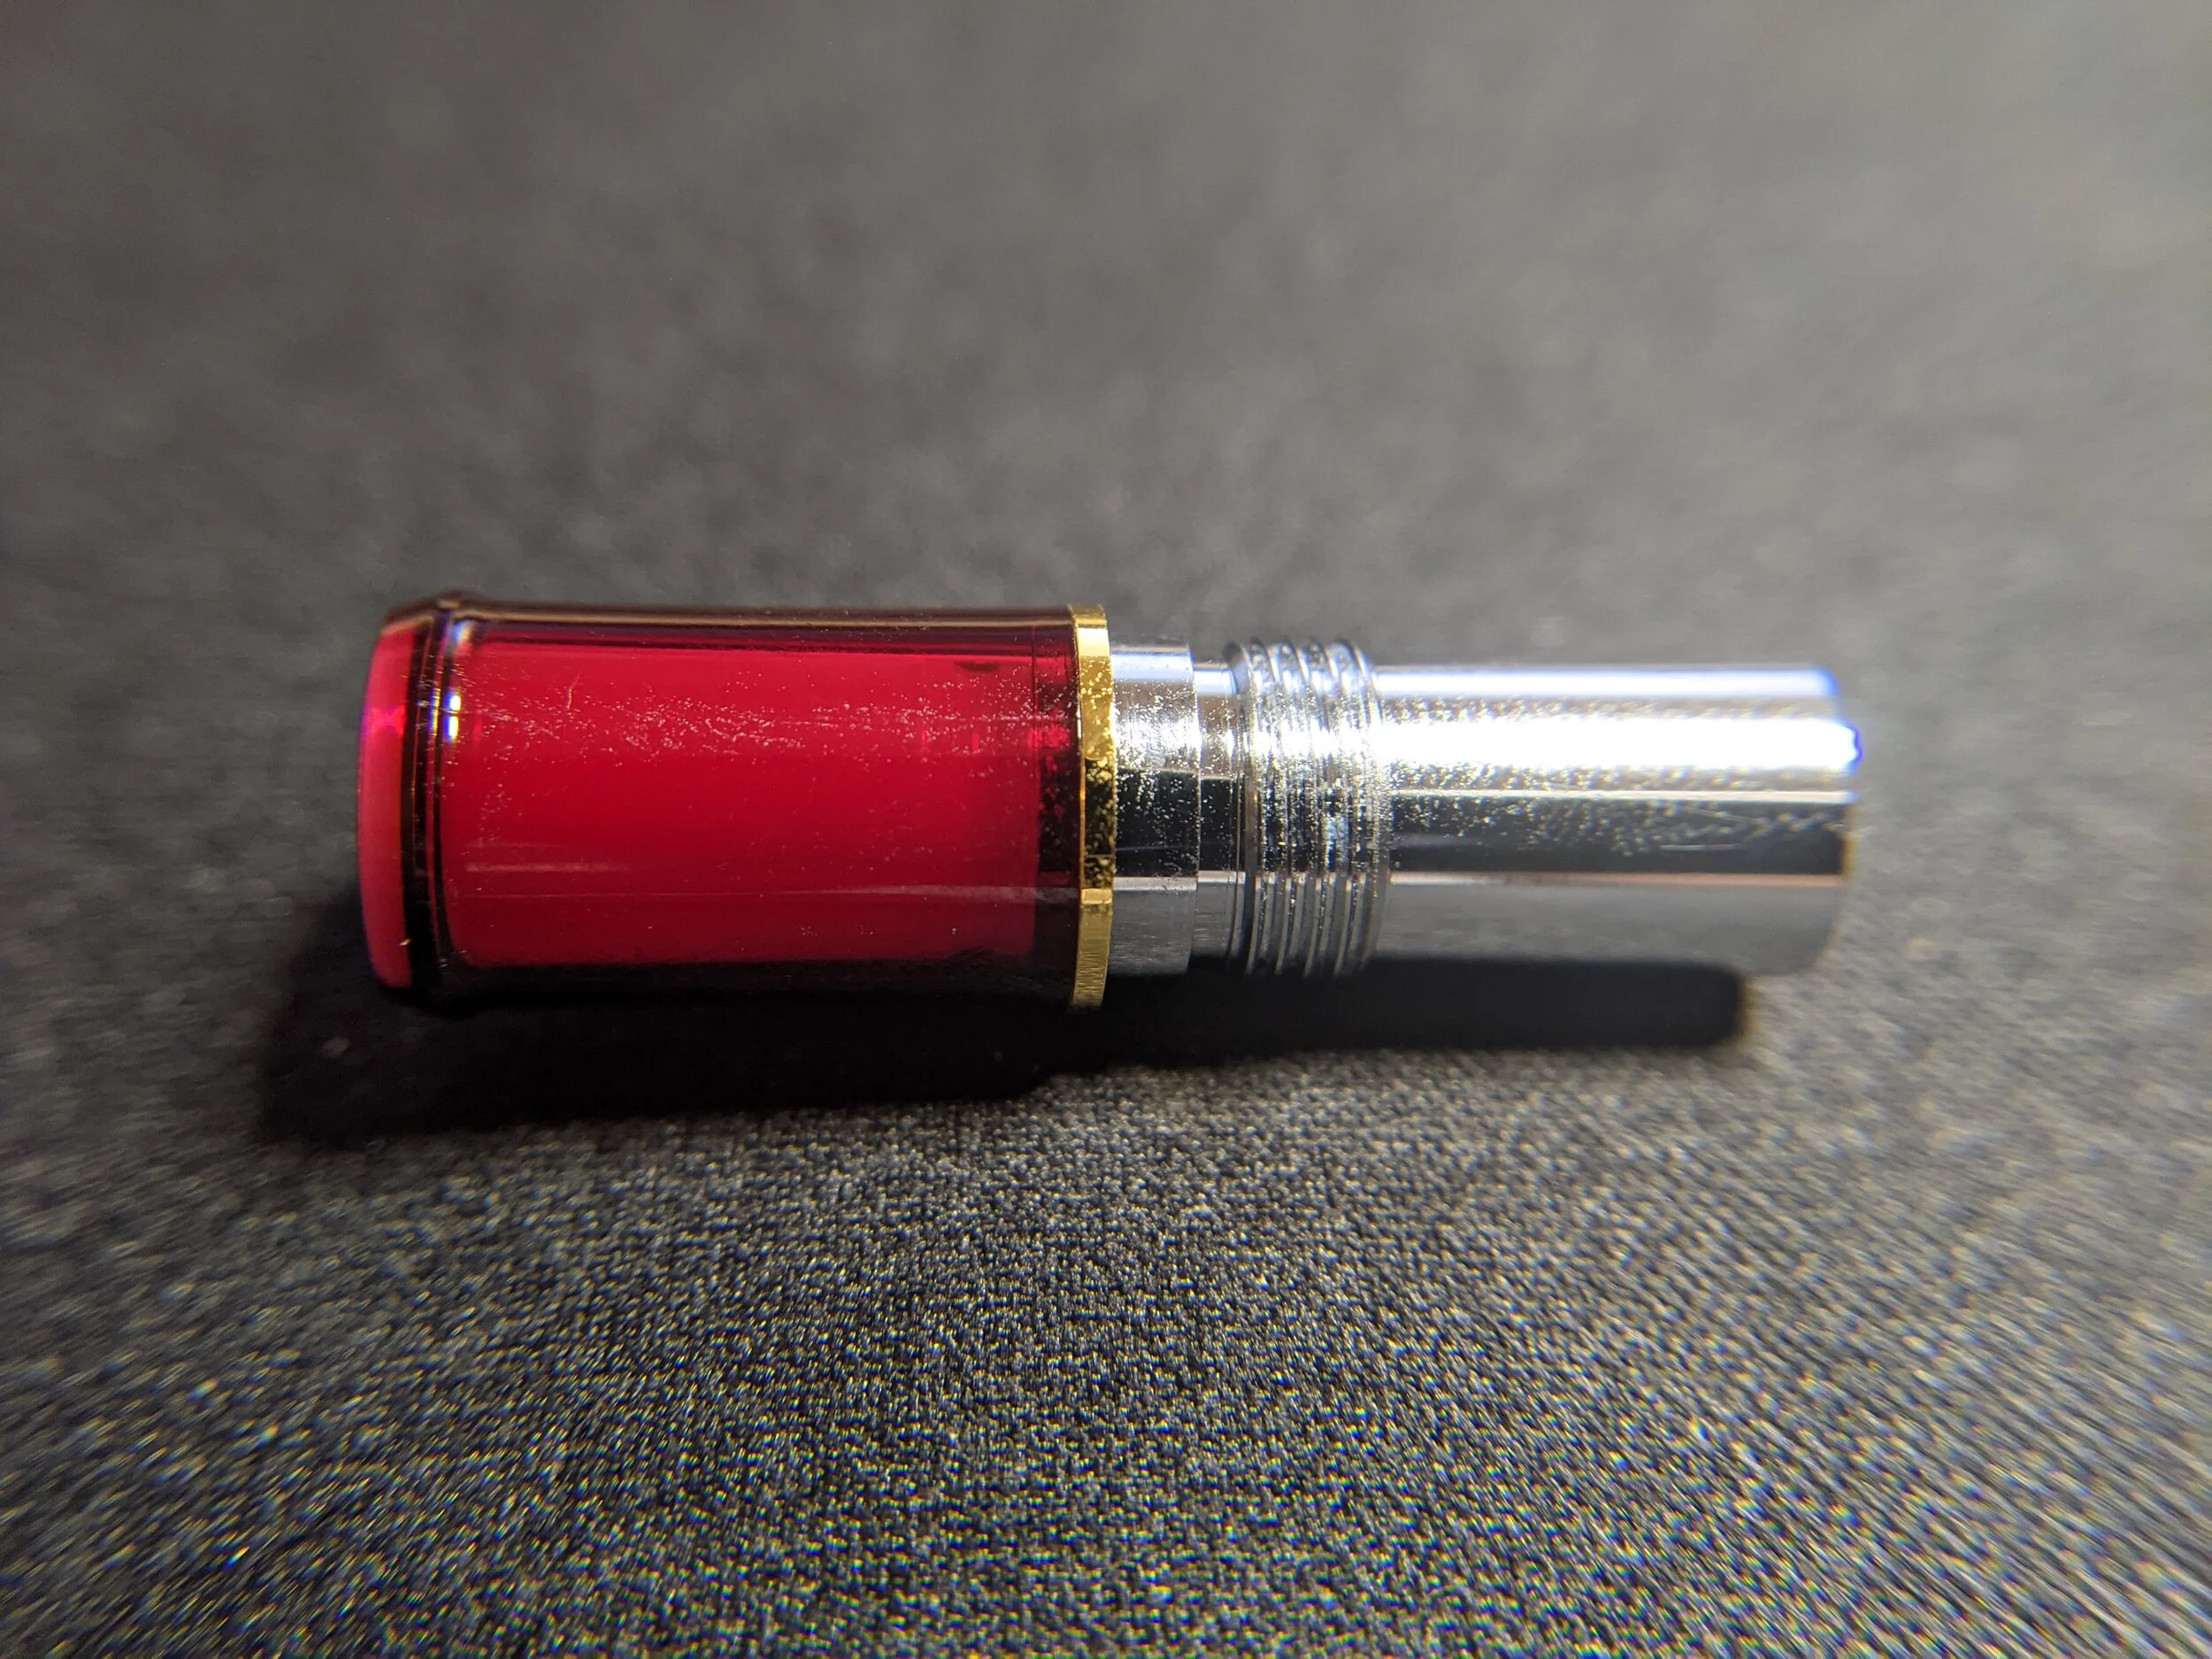
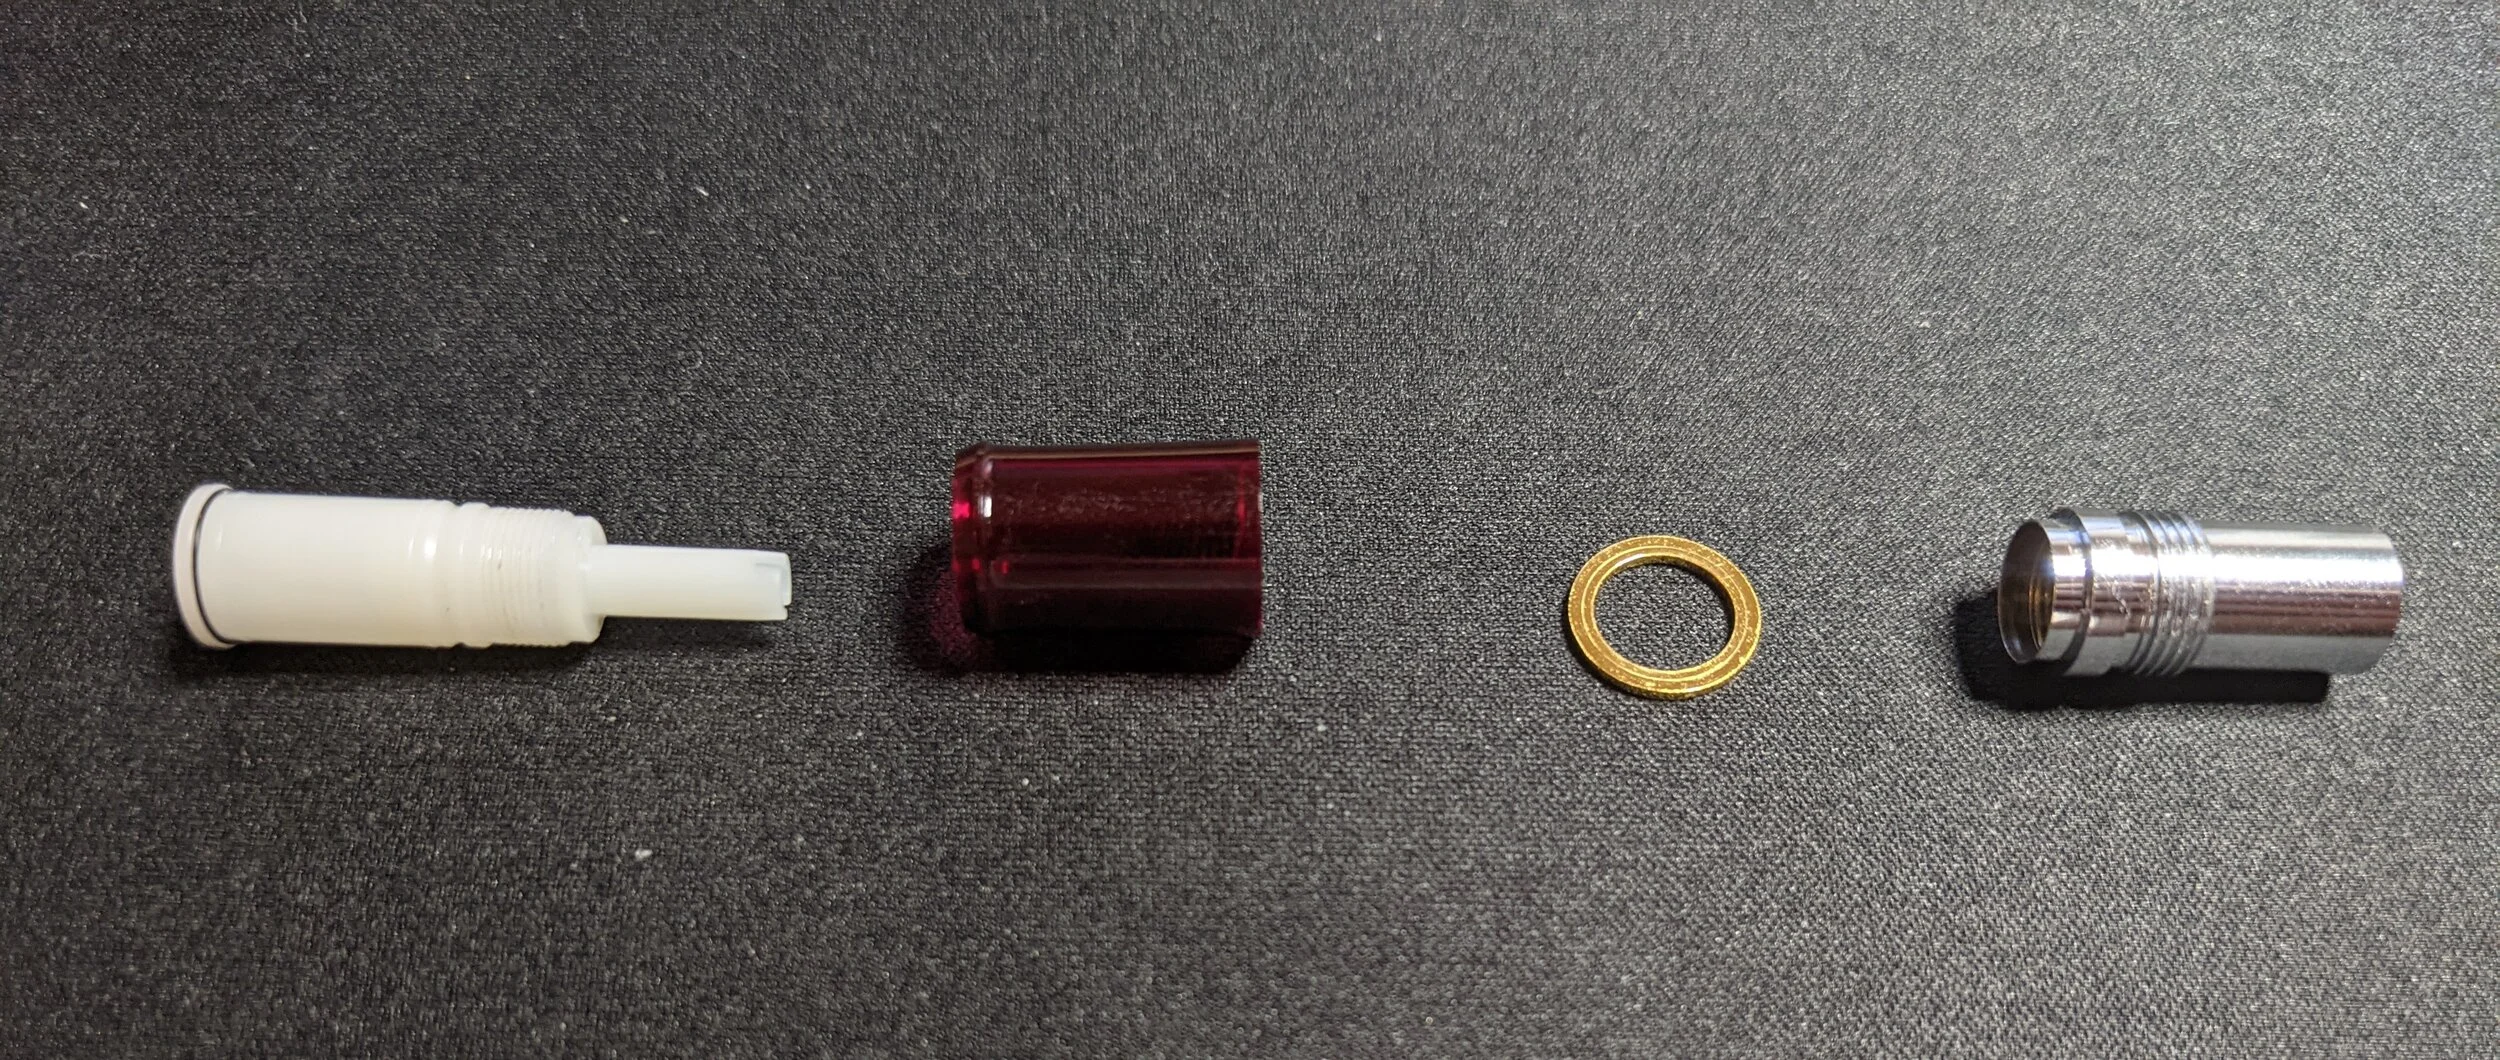
Pictures of the grip section
While this is not my Nice it follows the same principles. There is an outer collar and an inner collar. In this case, this 3776 has a red outer collar and a white inner collar. What I thought was ink inside my Nice was an o-ring that I promptly destroyed trying to get the grip section back in place.
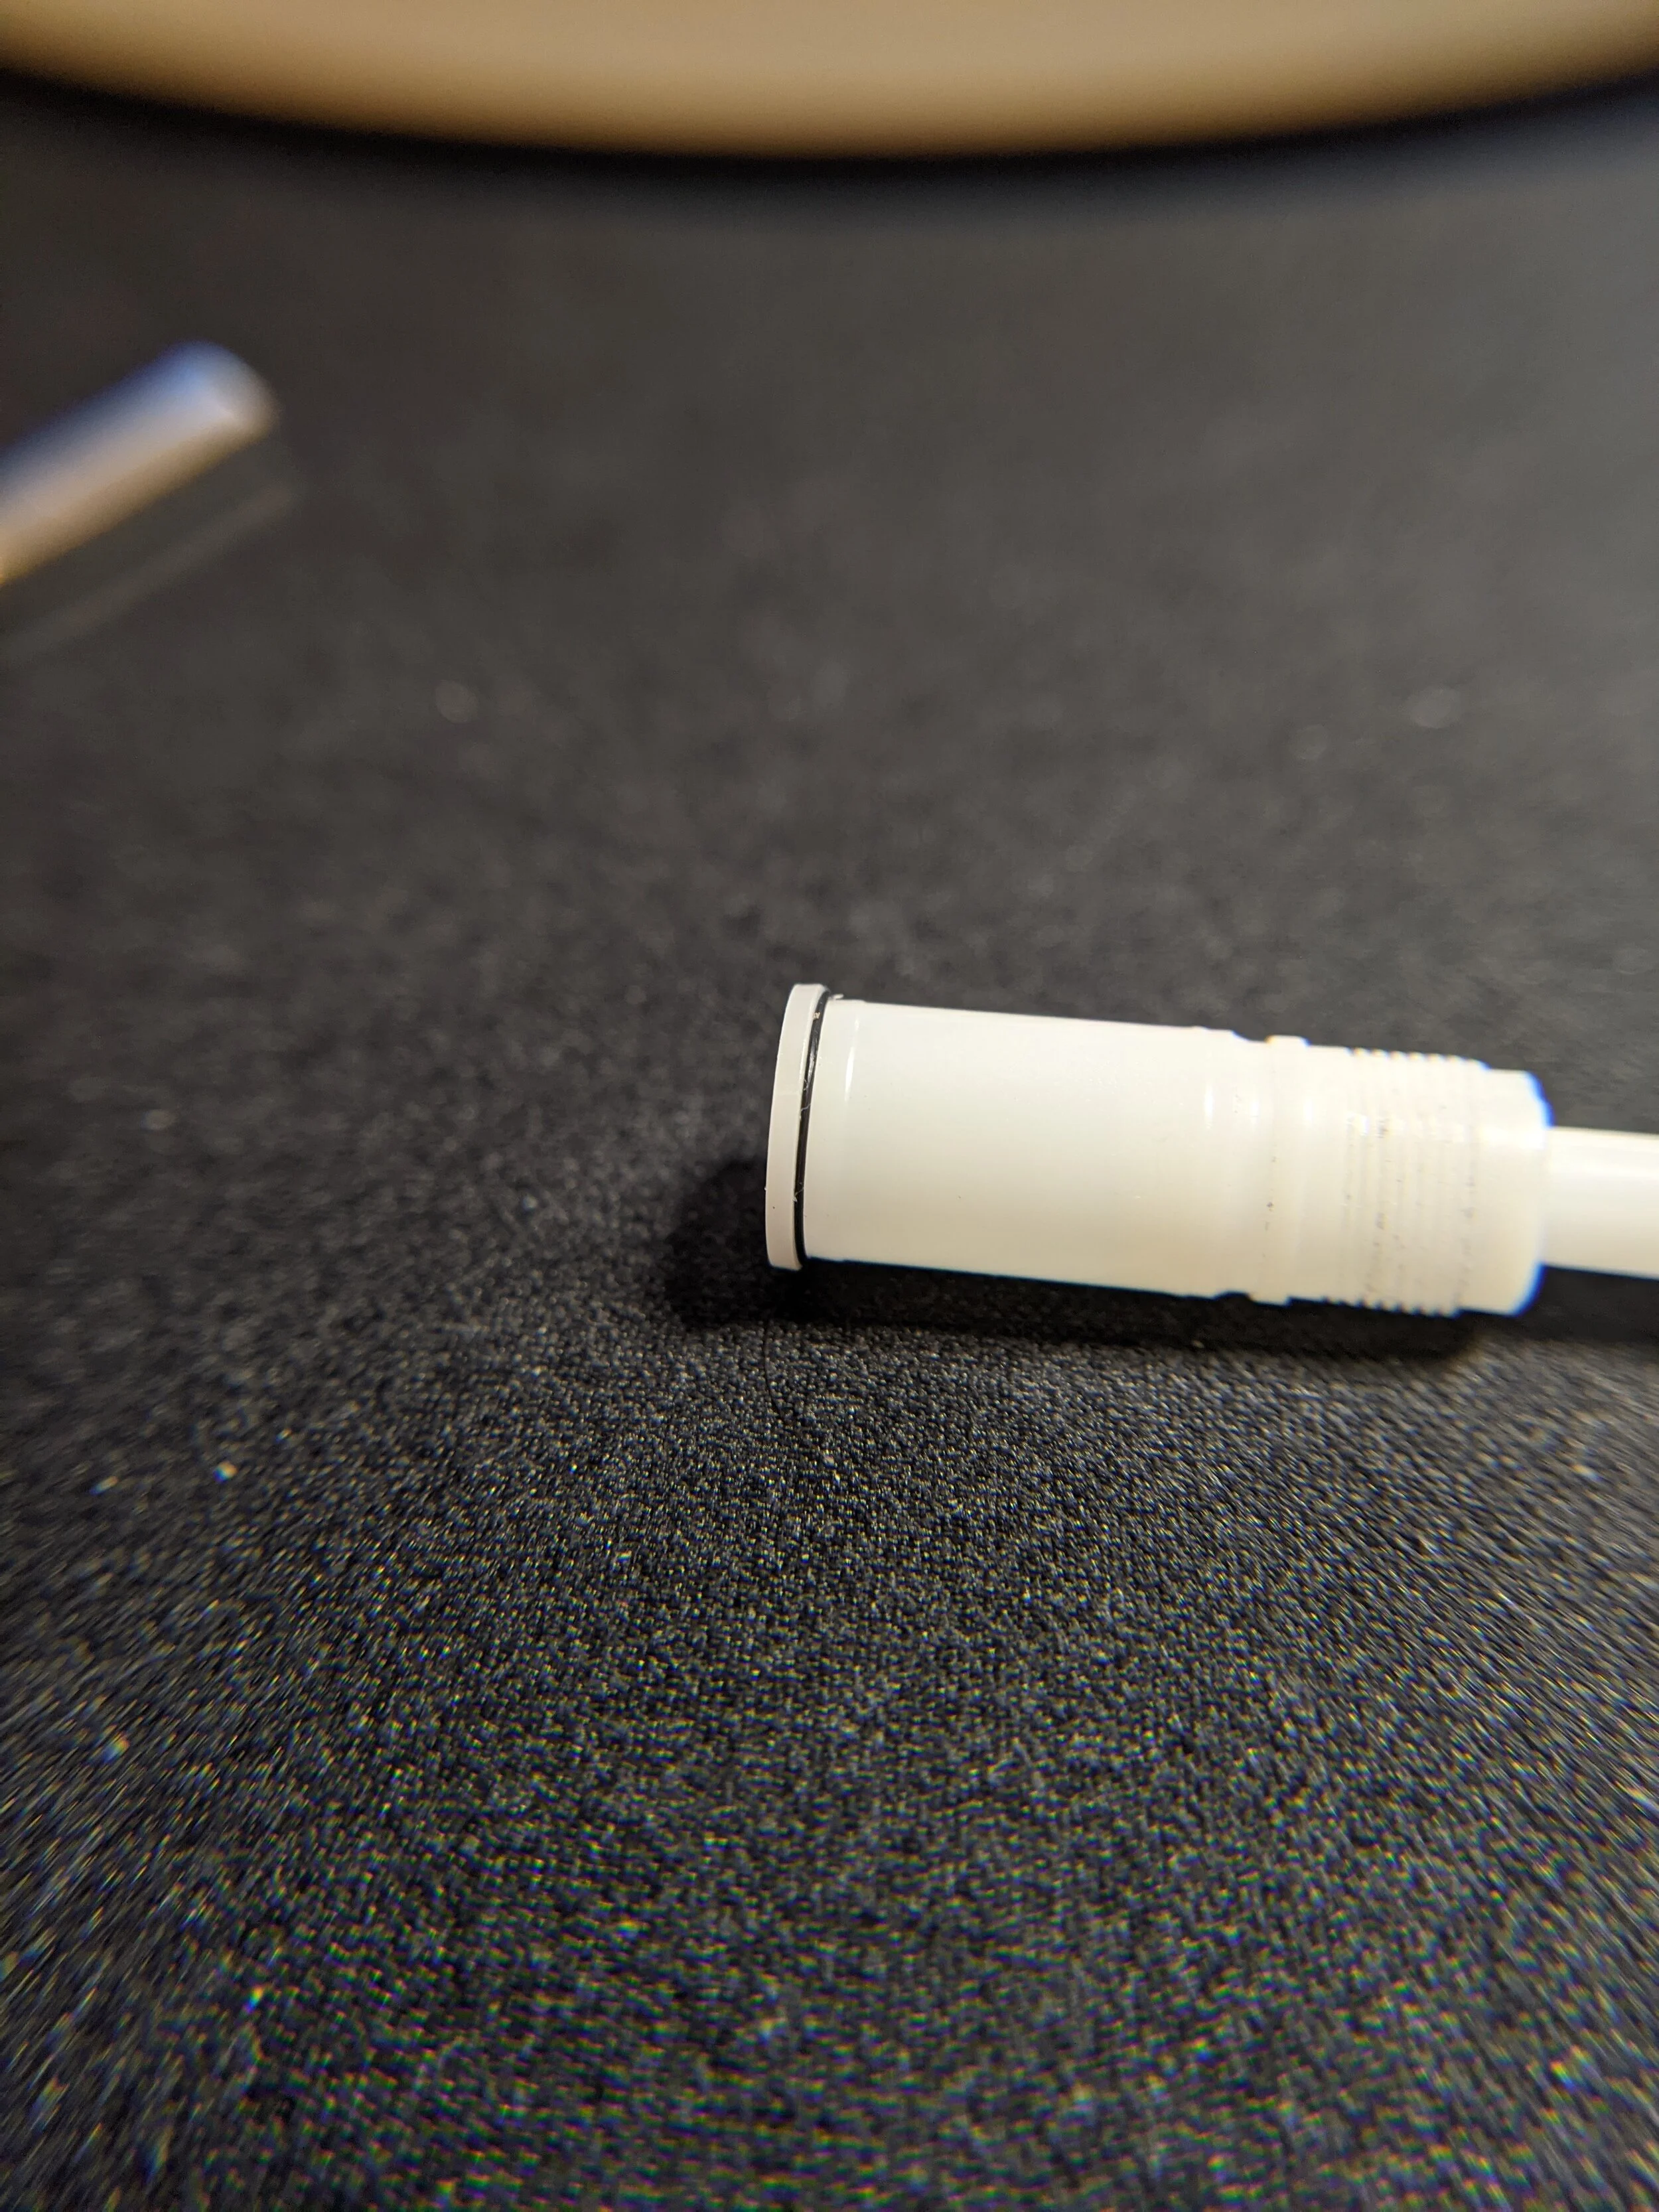
The inner collar was one of the most interesting parts of the 3776. It houses the nib and feed and screws into the section with threads. The interesting part is that the threads are exactly the same pitch and size as a Jowo #6 nib unit. You can take a #6 nib unit and screw it into the section of a 3776. But the catch is that it doesn't fit in there very well and only works when you have shaved down the flange on the Jowo housing. Here is a picture of a Jowo nib unit inside the 3776.
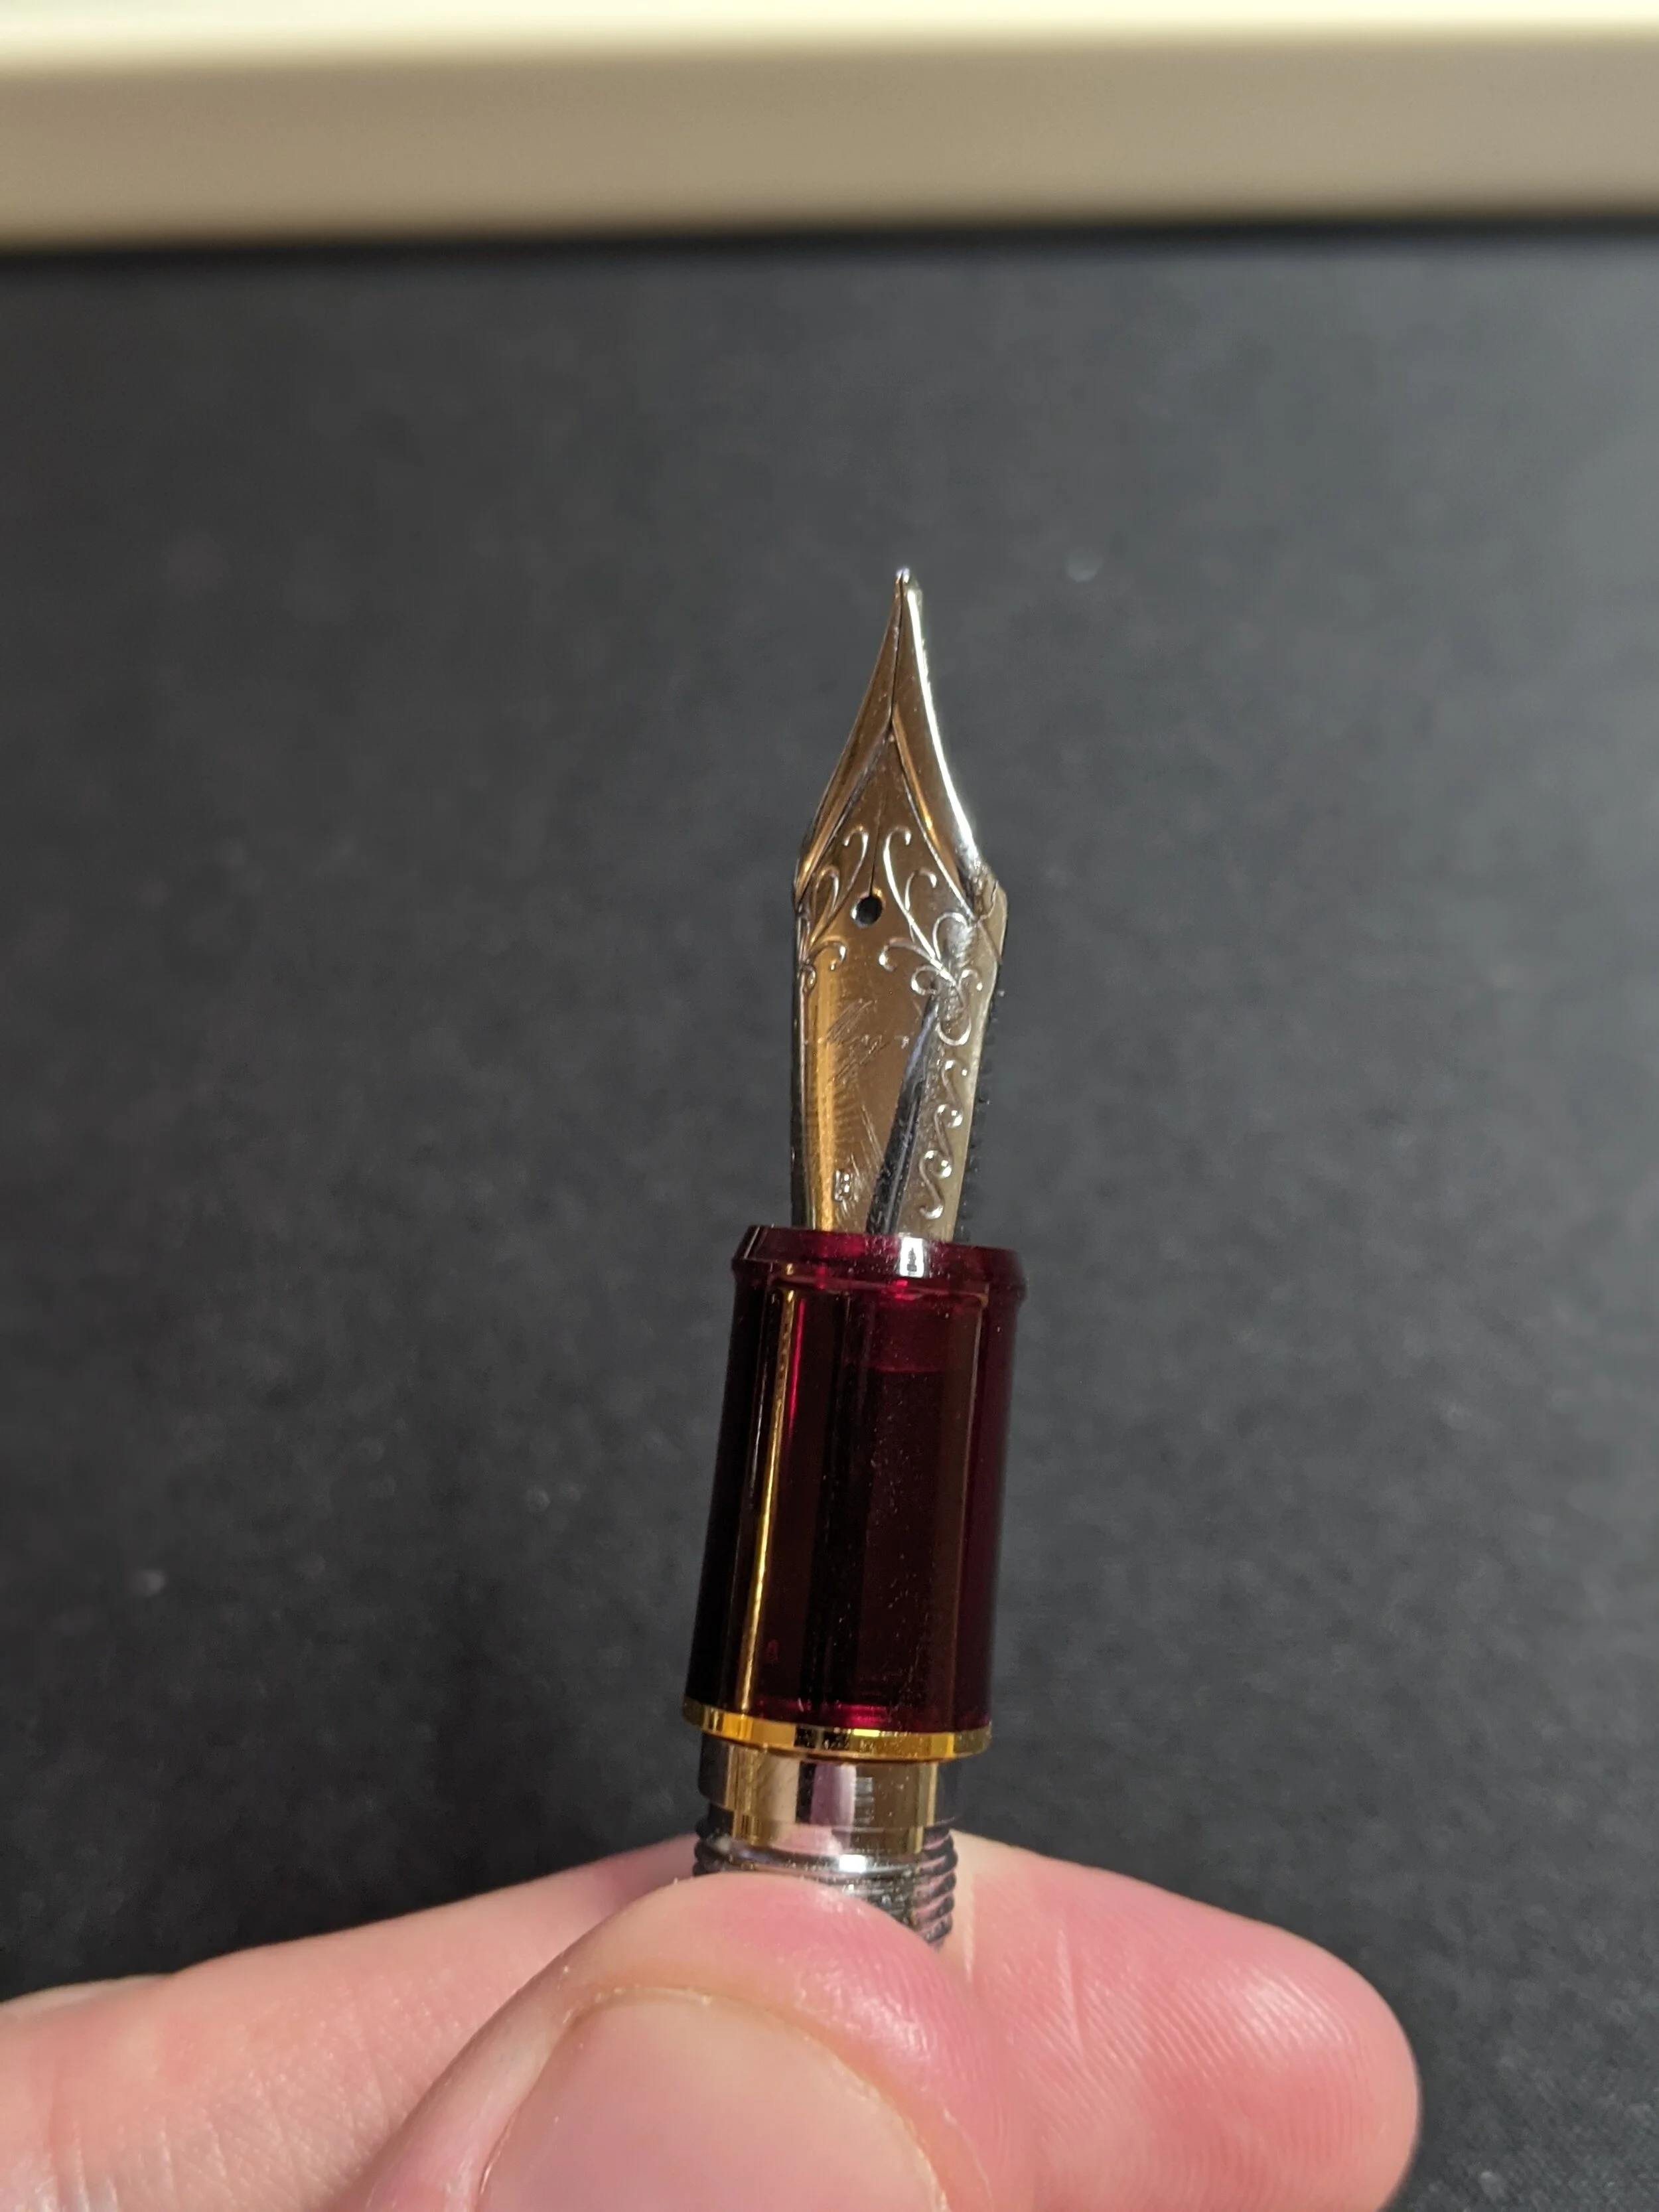
Back to the inner collar of the 3776. It has a small flange itself that serves to hold the o-ring against the outer collar and press the outer collar against the gold ring and secure it in place. The end of the inner collar is also where the converter mates onto.
So why have an inner collar and an outer collar? I don’t know for sure, but if I had to guess it is because of the tolerances involved in the friction fit. A friction fit is exactly as it sounds: the nib and feed are held into place by friction from the slight pressure that the inner collar is placing on the nib and feed. This type of fit cannot have very much room for error and will likely have an acceptable error of around a thousandth of an inch or 0.001 inches (in metric that's 0.025mm).
To make these tolerances work Platinum likely wanted to have a separate part that could be controlled by itself, choosing a material that was suitable to the tolerances is one possibility.
Now here is my word of caution when doing this. The Nice that I tried this on first has basically been destroyed. The clear inner collar of the Nice was made of a type of plastic that shrinks when heated so it no longer fits the Platinum nib and feed. I then took apart another 3776 and used the inner collar from there (which did not shrink). Then I found that the outer collar of the Nice had cracked. I think that I weakened the material when I heated it. The other standard 3776 did not exhibit any of these drawbacks, just the Nice. I don't see that much reason to take apart the grip section so I doubt it will be that popular a choice in any case.
The Barrel/End:
This was a little more interesting than I initially thought it was going to be. You see it was recently pointed out on a Tokyo Inklings podcast that there is a line that runs down the barrel of all 3776 models (the injection molded ones). This is either a parting line or a seam.
A parting line comes from the fact that when you are injection molding (filling a mold with molten plastic to make a part) the mold must be in two pieces and since the two halves of the mold will never have a seamless (haha) seam there is a little bit that flows into the space between molds. Usually, this is polished away which is why in most pens you will not see any seam (except on the threads where it is much harder to polish them out).
The other option is that there is a seam and that the 3776 barrel was made of two different pieces and afterward is bonded together somehow. This latter method is the way that I think it was done. Creating injection molded parts in the shape of a barrel has its problems as you need to have a middle piece as well to create the hollow inside. If you use two pieces then you can have a simpler injection molding process with the added problem that you now need to attach the two pieces together. The main reason I think that it is two pieces together is that the seam goes into the inside of the pen. If you examine it under a loupe you will see that the seam goes inside the pen which would not happen if it was injection molded as all one piece.
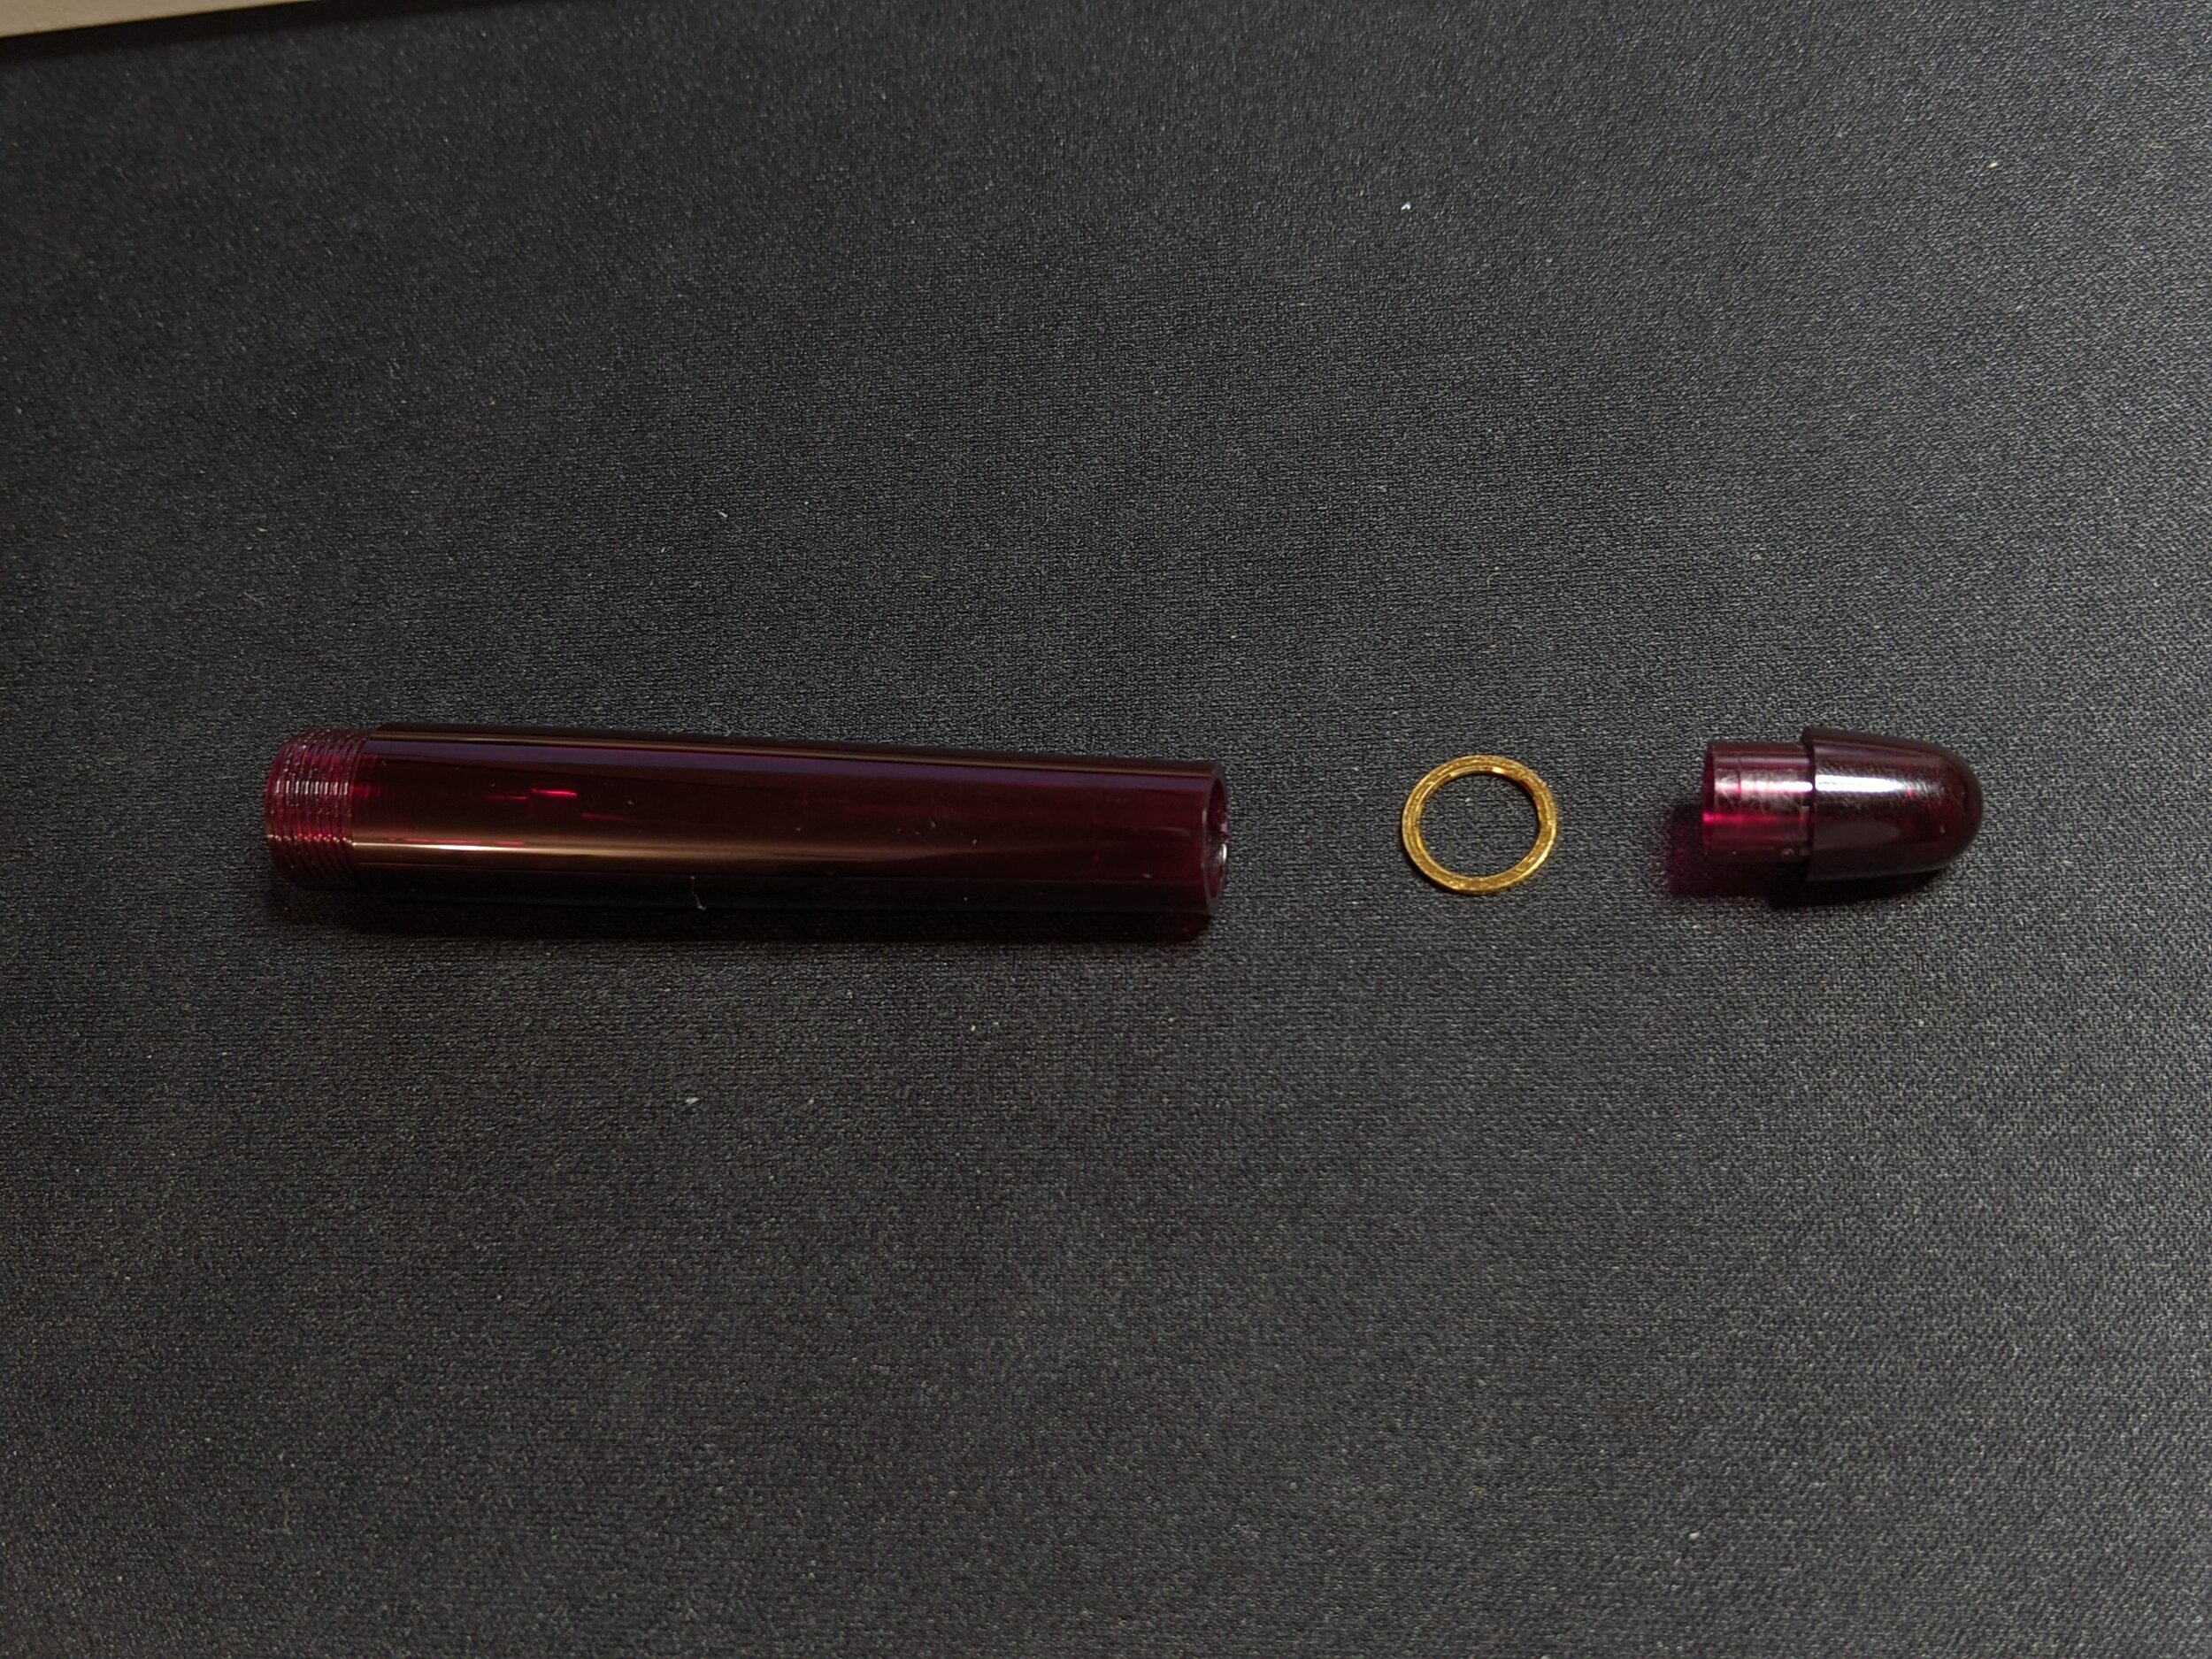
The end of the pen is two different pieces with a gold ring separating them. The reason you would want to have two pieces here is again due to the injection molding process. A barrel closed at one end is much harder to make than one that is open on both ends. So there must be an end finial.
I find the reason for the rings that are often on the ends of pens to be kinda funny in that they are using it to hide something. As any machinist or pen maker will know it is very difficult to get two cylinders to be the exact same size when you have made them separately. Human fingers can sense differences of less than 0.001 inches. So there is no possibility that Platinum could make something that would feel seamless for a reasonable price. The ring is placed there to mask the fact that the end finial and the barrel are not exactly the same size.
Again this was attached with the same glue that the other parts were attached with and I used the same method to get it off.
Next steps:
As I said earlier I have a plan to modify the 3776 in certain ways. The first step here is looking at how to take it apart so that we can augment it. The next installment is about how I plan on adding a filling system to the 3776 and will broadly be about how each type of filling system works and how to make them. What thread sizes you need, how to choose o-rings, and 3D printing techniques that will allow you to make your own modified 3776 or even design your own piston or vac filling system.
As always I hope you enjoyed this article and I hope that it was helpful. I had a little bit of heartbreak with my Platinum Nice but I hope that you will learn from my mistakes. I can’t wait to share the next installment with everyone. Its been really nice to be received so warmly by the fountain pen community. If you want to get updates on when I post articles you can follow my Instagram @Minabeko_ or on Reddit at u/Minabeko. Either way, it really helps me out if you share these articles and spread the word! If you would like to support me I have a Patreon, I’m planning on adding some special perks such as a future podcast of me reading the articles and adding some extra commentary. Thank you!
-Minabeko